
Give Homemade Bread a Second Chance–Easy Rustic Rye
For those who are regular bakers, the idea that bread-baking might need a second chance may seem surprising. After all there is nothing like a loaf of hot, yeasty bread pulled steaming from the oven.
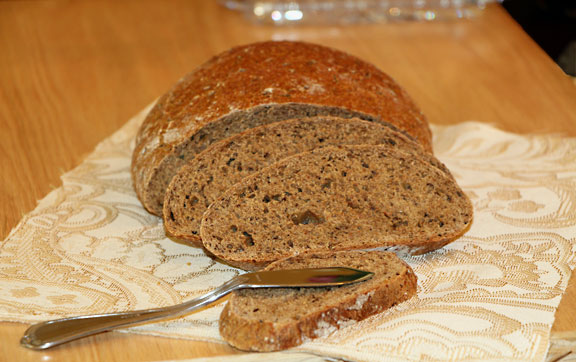
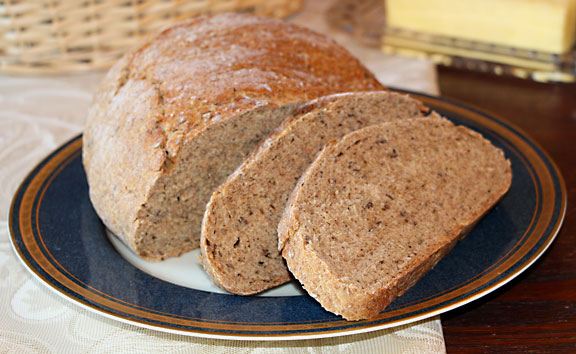
Rustic Rye Bread
But truthfully, even though I have baked for forever, there are times when I think, “I just can’t clean the mixer tonight.” That’s when I turn to this easy new approach which is perfect for experienced and novice bread-makers alike!
The technique comes from one of my fellow local bloggers. Molly, from Peanut Butter and Dill Pickles, has done a number of variations on the basic technique, in which ingredients are mixed up in a bowl by hand, left to sit for 12-18 hours, then baked in a enameled cast iron dutch oven. The advantages include skipping the heavy kneading (just a light knead at the end), no real forming of loaves and an easy cleanup. The one disadvantage is the long lead time, which is perfectly fine with me because it requires no (as in zero) attention during the wait.
I’ve done of few of these breads myself now and wanted to try making a loaf with the flavor of old-fashioined German rye rolls—the dark fragrant rounds studded with caraway and topped with chunky salt. In my first attempt, I put coarse sea salt on the outside of the loaves before baking (just like the rolls) and discovered a strange sight the next day. Overnight, the salt absorbed water and each crystal now looked like a damp spot of mold–nooooo! So for my next try I put a generous dose of salt inside the bread. The taste was virtually identical–whew!
This bread is the 4th recipe in my Kitchen Cupboard Spring Cleaning Challenge. Back… well, I can’t even remember when, I bought a 25 pound bag of rye flour and it seems like it’s lasting forever. These loaves disappear quickly, so this should help a lot!
Rye Bread Cut
(Almost No Knead) Rustic Rye Bread
Note: the directions are for a standard round loaf, but my baker is oval so the pictures won’t quite match. Also make sure your pan (especially the lid handle) is safe at higher temperatures. Some are only supposed to go to 375 or so.
Ingredients
- 1 1/2 c. all purpose flour, plus extra for final knead
- 1 1/2 c rye flour
- 2 tsp table salt
- 1/2 tsp yeast
- 1 1/2 c water
- 1 1/2 T molasses
- 1 1/2 T caraway seeds
Directions
1. Whisk together the ingredients in a large mixing bowl. Stir until a dough forms and no flour remains in the bottom or sides of the bowl. Cover with plastic wrap (or a bowl lid) and let sit overnight or 12-18 hours.
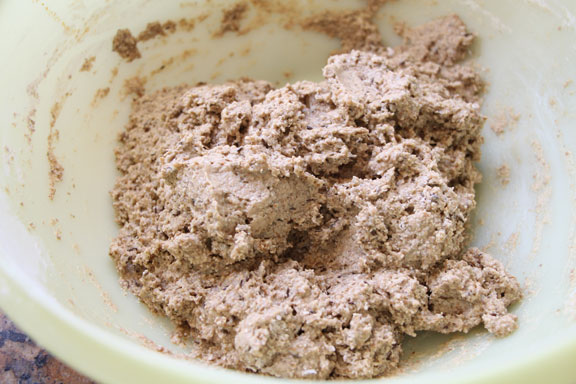
Easy Rye Bread Mixed
2. Preheat oven to 450°. When oven is preheated, place an empty enameled cast iron Dutch oven (with lid–be sure that your Dutch oven lid handle is safe at this temperature) into the oven. Set your timer for 30 minutes. While pot is heating up, turn the dough out onto a heavily floured surface and lightly knead the dough until smooth, incorporating enough additional flour so it is not super sticky and it holds a shape (this can be quite a bit of extra flour). Re-cover with plastic wrap (or lid).
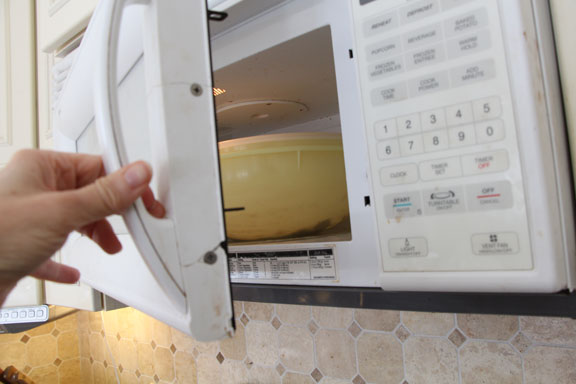
Rye Bread Rising
3. Once 30 minutes has passed, remove the Dutch oven from the oven and drop the dough ball in to ungreased pan (or if you are chicken like me, drop it in on parchment paper). Put the lid back on and place back in the oven. Bake for 30 minutes. (Note: the Dutch oven must be hot or the bread may stick).
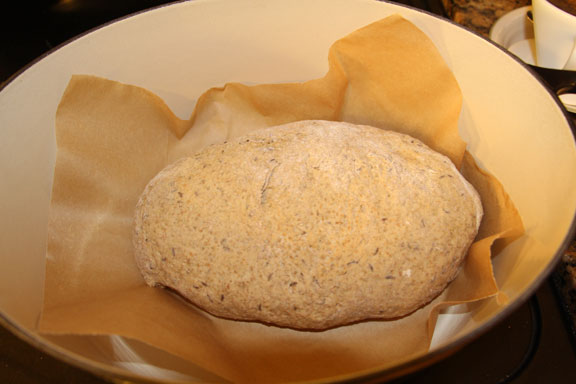
Rye Bread in Oval Dutch Oven
4. After 30 minutes, remove the lid and bake for 5-10 minutes more until the bread is golden brown and crusty. Remove to a cooling rack.
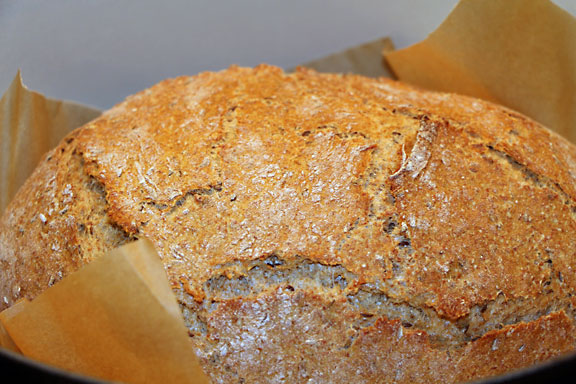
Rye Bread Browning
5. Eat warm or cool.

Rye Bread Cooling
* * *
Since the Kitchen Cupboard Spring Cleaning Challenge was part of my inspiration for this and I am one contribution behind in documenting my attempts to use one “rotting in the cupboard” food every other day, I am going to add another quick “recipe”. But first some background…
I had two packages of beef liver in my freezer from my last two beef purchases which I figure counts as really neglected. In all honesty, I am not fond of beef liver–even if it is organic and grass fed. And I don’t even want to consider how my kids would react if it appeared on the dinner table.
So I brought it over to my much-less-picky mother who will cook it up with bacon and onions. Yes, it almost sounds good that way (but not quite).
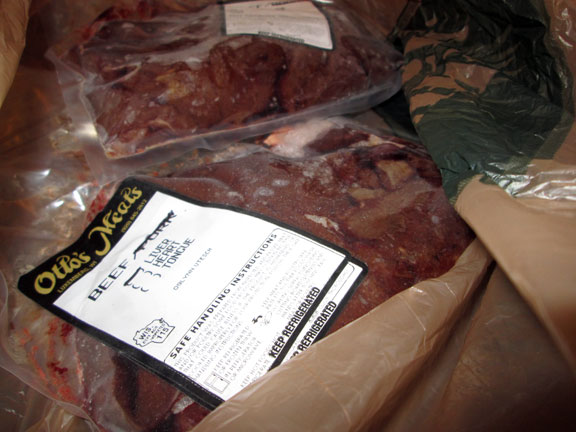
Beef Liver
Ingredients
- 1-2 pkg frozen beef liver
Directions
1. Remove beef liver from freezer. Place in grocery bag.
2. Drive to mother’s house. Put in mother’s freezer.
Expedient, right?
Pingback: Healthy & Tasty Sweet Potato Bread - Art of Natural Living
Pingback: Step by Step Home Cured Gravlax (Salmon) - Art of Natural Living
Hi Inger,
I have made your rustic rye dozens of times, all with great success. The only problem is getting the loaf to rise more than a couple of inches- altho very tasty, the slices are very thin because of lack of rising. I have added additional yeast and given it longer proofing but no luck. Any hints??
Cheers
Arby
Hi Arby-It’s hard to tell for sure, but if the loaf is very thin, you might need to add more flour in the final stage. I probably add a couple cups of additional flour (I should really measure some time), stopping when the dough is slightly sticky but dense enough to (mostly) hold its shape when formed into a round or oval. Then I form it into a tall-ish oval to help counter any tendency to go flat. It is always a dense bread (though not as heavy as a pumpernickel), but I think you should be able to get a thicker slice this way. Let me know how it goes. Good luck!
Thanks Inger. Will try with copious additional flour. Sounds logical. Will let you know.
Just finished a loaf of your rustic rye. Great recipe. I increased the rye and decreased the white flour by 1/4 cup each. Next time will reduce the salt and molasses a smidge. Good crust and tender inside when toasted. A keeper!
So happy to hear that you enjoyed this Bruce–and thanks so much for letting me know! Based on your success I may try with less all purpose flour myself next time. For my last loaf I left out the caraway for my caraway hating brother!
Hi. I like caraway also but with bread, it commits to being used as a savoury item only. I like the flexibility of using rye toast heaped with peanut butter and banana for breakfast then as a savoury lunch delivery vehicle for cheese, pâté, hard-boiled eggs, cold cuts etc…..Very versatile. BTW, I let it rise for 24 hours.
24 hours! I can see you plan ahead better than I do 😉 Someday I may try doing this in a cocktail rye shape–that’s one of my favorite uses for rye bread.
Pingback: There’s No “Cat” in Catfish Sandwich (with Lemon Caper Sauce) | Art of Natural Living
I love this technique for bread! When I do it, I proof the bread in a “sling” of parchment paper in a bowl, that way it is nearly foolproof to transfer it to the hot dutch oven when it’s time to bake. And your liver recipe made me laugh! I’m actually a fan of chicken and rabbit livers, and an ardent fan of goose and duck livers, but I’m still a little unsure when it comes to veal and beef livers. I don’t suppose they could be made into pâté…?
I like chicken liver too and years ago had whitefish liver which was great, though I shudder now to think of the environmental contaminants it must have contained. I have a pork liver in my freezer too which I may try in pate which I guess is traditional in Denmark. I assume that was in my Danish grandmothers version growing up. There may be a post in it if it turns out!
I love no-knead or almost no-knead breads! With a little effort you get a lovely rustic and delicious bread to enjoy! Yours looks beautiful!
Thanks Kathy. I thought that this was a great discovery!
I’ve been baking no-knead bread recently, and I’m amazed at how delicious it is. Oh, and I loved your last “recipe”.
Isn’t the no-knead bread wonderful–it almost feels like cheating to me! Glad you enjoyed my liver “recipe” Beth 😉 Some things are just better off being taken care of by others!
Barry is an absolute fan of rye bread so maybe I should give this a try, Inger.
You should give it a try. I just made another loaf for Mother’s Day (hmmm, wasn’t someone supposed to do that for me?)
the bread looks amazing but the liver you can have!
You have impeccable taste Tammy!
Just pinned this recipe, can’t wait to try it because I love rye bread.
I was so happy that Molly’s process worked for this–there are some sandwiches that just have to have rye bread I think.