Fall Sugar Cookies
I try to eat healthy. But every so often I want something indulgent. Tasty. Sweet. Even pretty. And with beautiful autumn leaves falling all around me for inspiration, I decided to try making some fall sugar cookies.

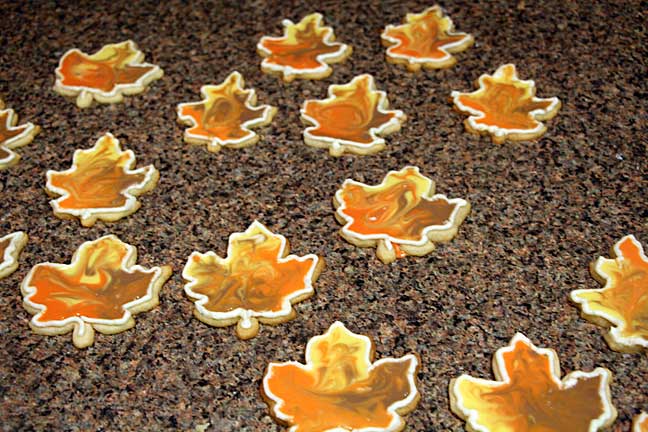
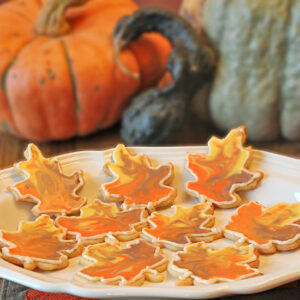
Fall Leaf Cookies, Served
Now the last time I tried making decorative sugar cookies was a few years ago. I made them to celebrate Easter. That year we ate a big batch of seriously ugly bunnies and duckies. And it was the last time I tried “cute.”
But recently I saw a technique called cookie flooding at The Gold Lining Girl, and I thought, “well, maybe.”
Fall Sugar Cookies
Ummm, make that “Well, YES!” While the cookies were just a little time consuming, they required very little manual dexterity–which is really important. And they were impressive enough to give away as gifts!
To use this technique, you pipe an “edge” around the outside of the cookie, put different color blobs of icing in the middle, then swirl them out to the edge. Seriously, it is that easy.
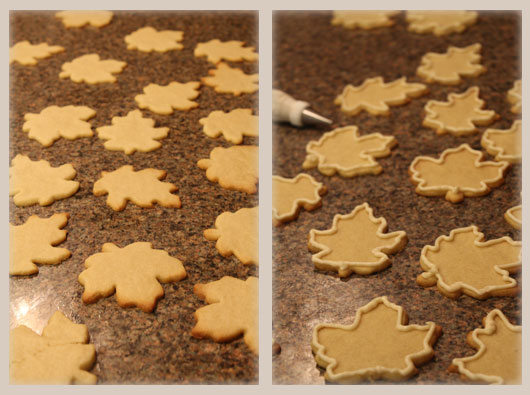
Cookies in progress
In slow motion…
You pipe a buttercream line around the outside of each cookie using a pastry bag fitted with a small round tip (I used a #4). No pastry bag? You can use a plastic bag with the corner cut out to make a small opening.
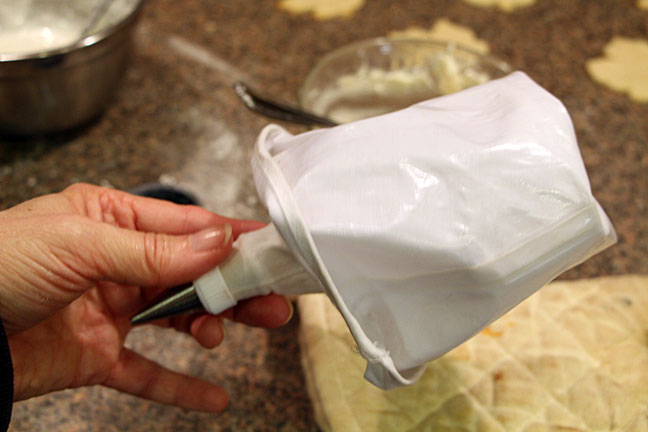
Fold pastry bag over for easier filling
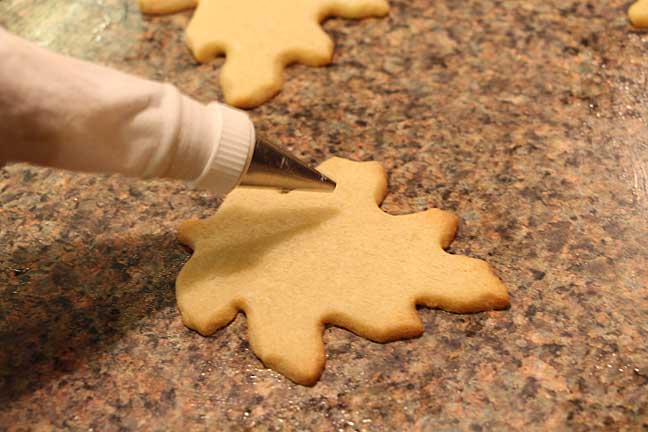
Pipe an outline around cookies
This is the only part that is hard at all. My first couple attempts were not too good, so I scraped the frosting off (putting it back in the pastry bag) and started over. The edge is decorative but it also acts as a bit of a dam for the slightly runny frosting that will fill the center. And it doesn’t need to be perfect.
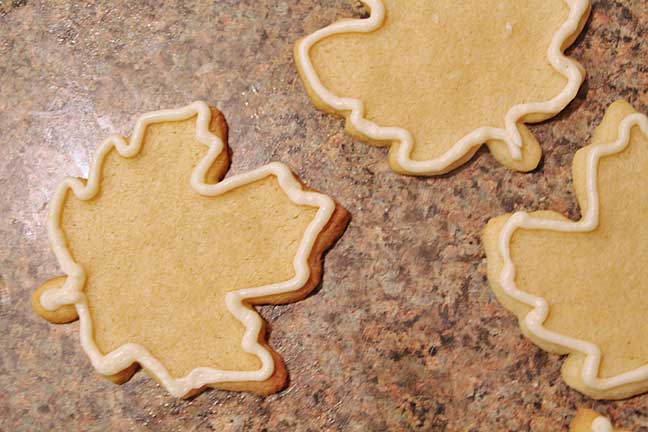
Fall Sugar Cookies, Outlined (Note very-not-perfect lines on right-most cookie)
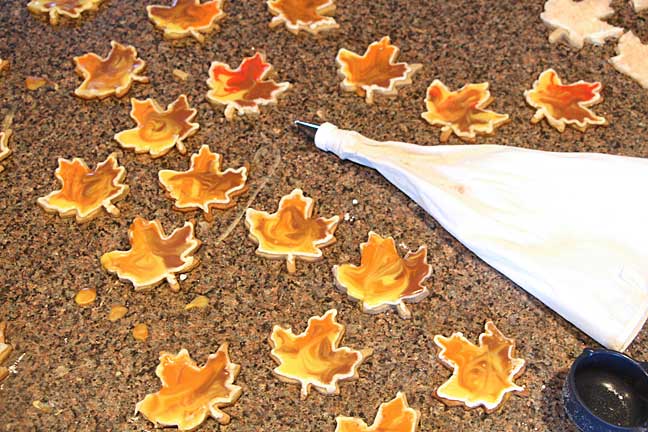
After finishing the edges, you put three blobs of different colored “royal icing” in the center of a cookie. I recommend using fairly bright colors, since that looks better after swirling.

Add Royal Icing
Then you use an object with a blunt point to swirl the frosting out to the edges of the cookies and make interesting swirls.

Swirl colors
Finally you let them sit a bit so the icing can harden up some.
After a multiple year sugar cookie hiatus, this is my second batch in a couple weeks. I can hardly wait for Christmas!
My first batch
I have it all below in recipe format. The sugar cookie recipe comes (more or less) from Wilton. The buttercream frosting is my usual and the royal icing came from the original except for adjusting the amount (since I ran out the first time–perhaps rolling my cookies thinner).
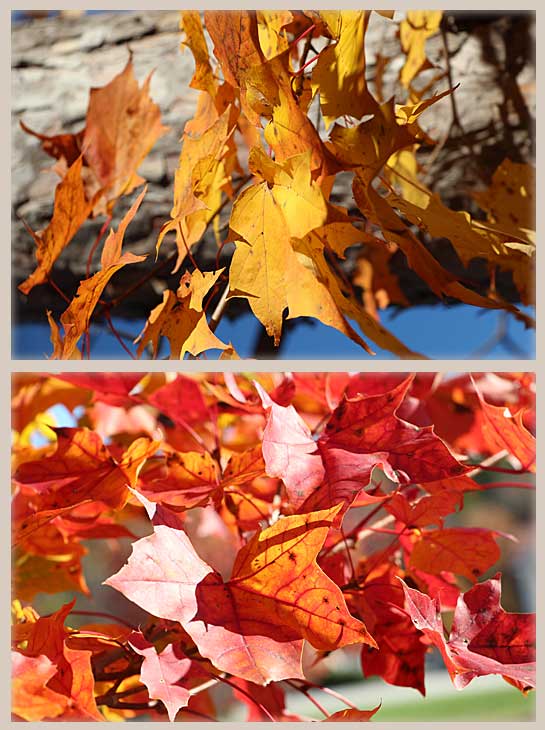
Fall Leaves Inspire Fall Sugar Cookies
Frosted Fall Sugar Cookies

Ingredients
Cookies
- 1 cup (2 sticks) unsalted butter, softened
- 1 1/2 cups granulated sugar
- 1 egg
- 2 teaspoons pure vanilla extract
- 2 3/4 cups all-purpose flour
- 1/2 teaspoon salt
Buttercream frosting
- 1/2 cup butter softened
- 2 cup powdered sugar
- 1 teaspoon water
- 1/2 teaspoon vanilla
Royal icing
- 4 Tablespoons water
- 4 Tablespoons corn syrup
- 4 1/2 cups powdered sugar
- food coloring
Instructions
For cookies
- Preheat oven to 400°F.
- In mixing bowl, cream butter with sugar until light and fluffy. Beat in egg and vanilla. Mix flour and salt; add to butter mixture 1 cup at a time, mixing after each addition.
- Divide dough into 2 balls. On a floured surface, roll each ball into a circle approximately 12 in. wide and 1/8 in. thick. Dip cookie cutter in flour before each use.
- Bake cookies on ungreased cookie sheet 6-7 minutes or until cookies are lightly browned. Let cool before frosting
For buttercream
- Combine all ingredients in a small mixing bowl, adjusting water and powdered sugar as needed to achieve desired (thick) consistency. Mix until fluffy.
- Fill a piping bag fitted with a small circle tip (e.g. #3 or #4) with buttercream frosting, and set aside. Alternatively, cut a very small hole in the corner of a plastic bag and fill (note: I haven't tried this but people say it works).
- Using the buttercream frosting in the bag, pipe an outline around the border of the cookie. Allow to set up for about 10-15 minutes.
For the royal icing
- In a medium bowl, combine all ingredients and whisk until smooth. Consistency should be that of a thick syrup, similar to molasses. Adjust water and corn syrup accordingly.
- Separate royal icing into three smaller bowls. Mix in food coloring to make yellow, orange (red & yellow colors) and brown (red, yellow & green or blue). Adjust as desired.
- When ready to flood, use extra piping bags or a small spoon to drizzle different colors of royal icing onto each cookie.
- Use a narrow pointed object to drag icing to the edges, without allowing it to spill over.
- Swirl until you reach a pattern you like.
- Allow to dry for 2-4 hours or overnight.
Pingback: Christmas Cookie Snowflakes and Stars | Art of Natural Living
Your cookies are lovely! The swirling looks so natural, and so elegant. You honestly look like a master of sugar cookies!
Yum. They look amazing and so professional.
Inger, that is ingenious! And I’m very impressed. I have to say my icing skills are pretty poor to say the least but I do like the idea and can now see how it’s done thanks to your post…. I’m going to wait and see your Christmas cookies 🙂
Mmmmm, autumn leaves look great on a plate or on a tree!
hey Inger what lovely leaves, look beautiful! I love them!!
Wow! These look amazing, Inger! Love how realistic they look! Your presentation and photos are lovely!
Thanks Kathy. I was so happy to have a success with these!
These are beautiful! And they look tasty too.
Thanks (And they are tasty too!)
Oh my gosh, those are gorgeous! All of a sudden my sweet tooth is back.
Inger, how do you determine the Nutrition contents?
I just took a bunch of these with me to the vet (with my sick kitty) since I was eating too many ;-). The nutrition is done by the program that formats the recipe. Usually I double check with another online source (though I was in a hurry and didn’t for this one) that anyone can use. If you want to check one of your recipes, you should take a look at http://caloriecount.about.com/cc/recipe_analysis.php
I’ve been afraid to try royal icing but with such pretty results I’m now convinced I need to try it! So far I’ve always decorated my cut out cookies with buttercream frosting and sprinkles.
Royal icing isn’t quite as tasty as buttercream, but that just took them down from completely irresistible to still completely irresistible (see note in next comment about having to take cookies to the vet due to no will power). Unlike many, this recipe didn’t use any egg whites or meringue powder, which I thought would be nice for people who prefer to skip the raw egg and don’t have meringue powder on hand. I subbed maple syrup for the corn syrup in my second batch (since corn syrup is probably GMO unless organic) but those took longer to harden (though my water could have been off) so I went with the original for the post. There will probably be more experiments with the upcoming holidays! Totally worth a try Karis!
These are so pretty! They almost make me want to make sugar cookies this year (I swore off making them after my attempts last Christmas with just one child underfoot, haha).
I had to chuckle Lynn. Out of college I used to give away big tins with lots of different Christmas cookies. Then once I had kids, it was just sea foam candy (since my dad loved it) and spritz cookies (fast and used the leftover yolk). If it weren’t for their grandma, my kids would never have known there was any other kind 😉 Now that they are older, I have hopes for this Christmas!
Those came out great! Thank you so much for linking back to my Cookie Flooding post! Those turned out wonderful! I’m so glad you tried it. 🙂
Sarah–thank you so much for doing these. I really am a kitchen klutz and succeeding at a pretty cookie made my day. I will be over to comment and offer a testimonial soon!