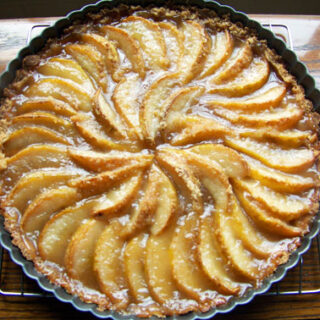
10 Minute (Beautiful) French Pear Tart
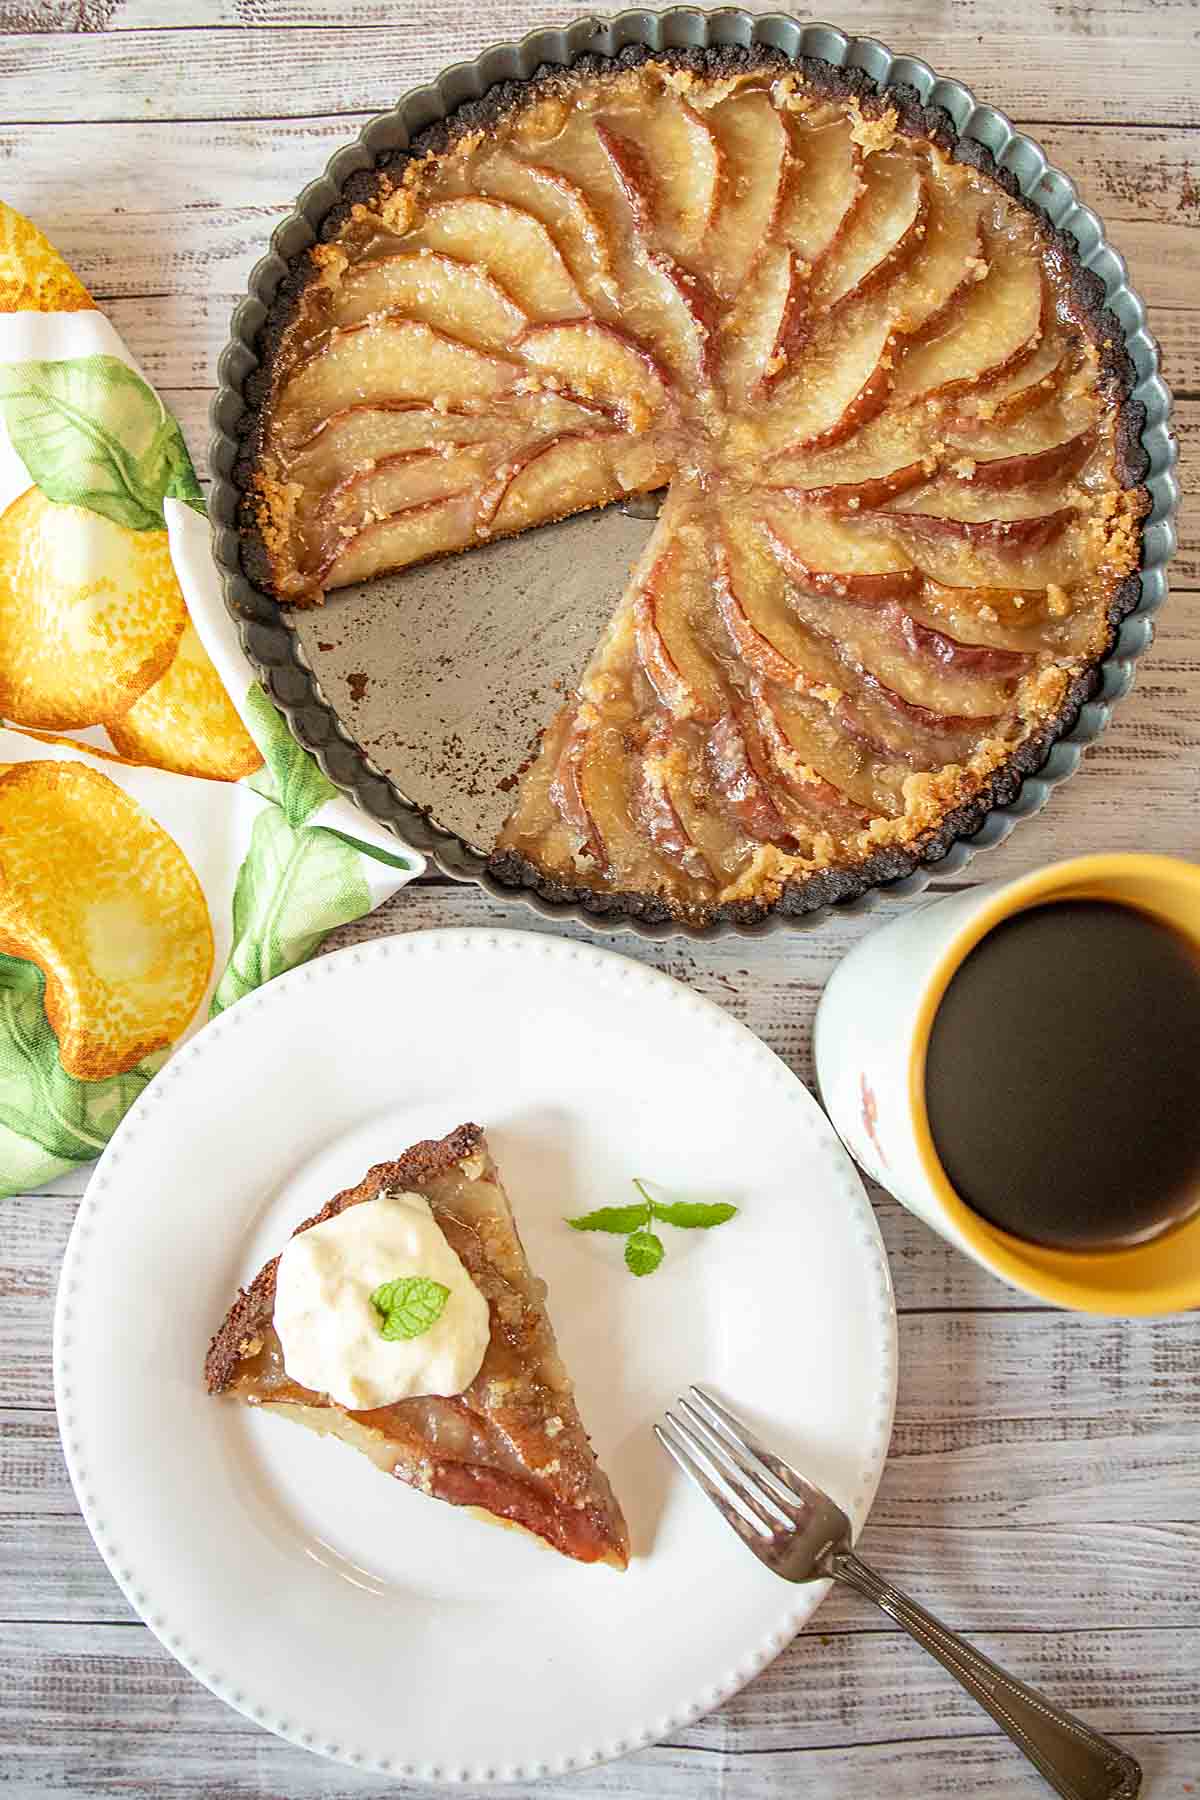
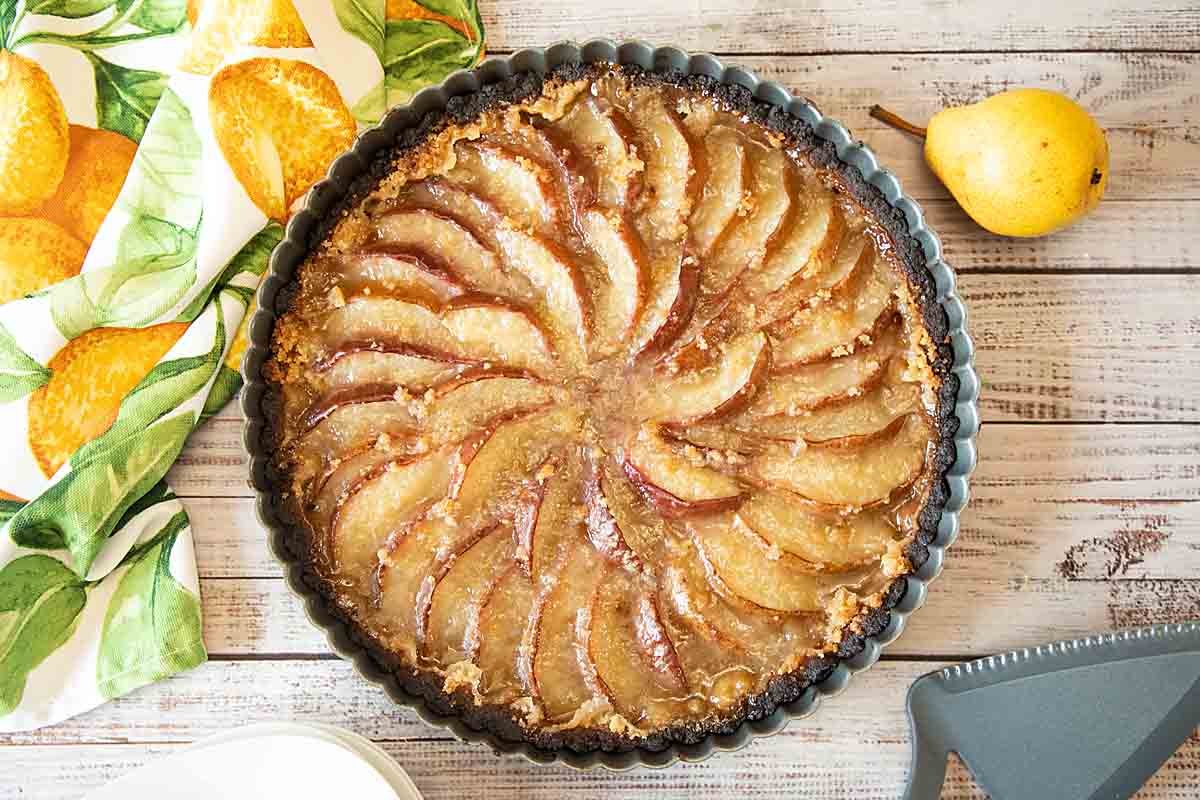
With a simple topping that melts into a beautiful glaze & a press-in crust, this French Pear Tart is a quick, easy & tasty dessert. Vegan option. 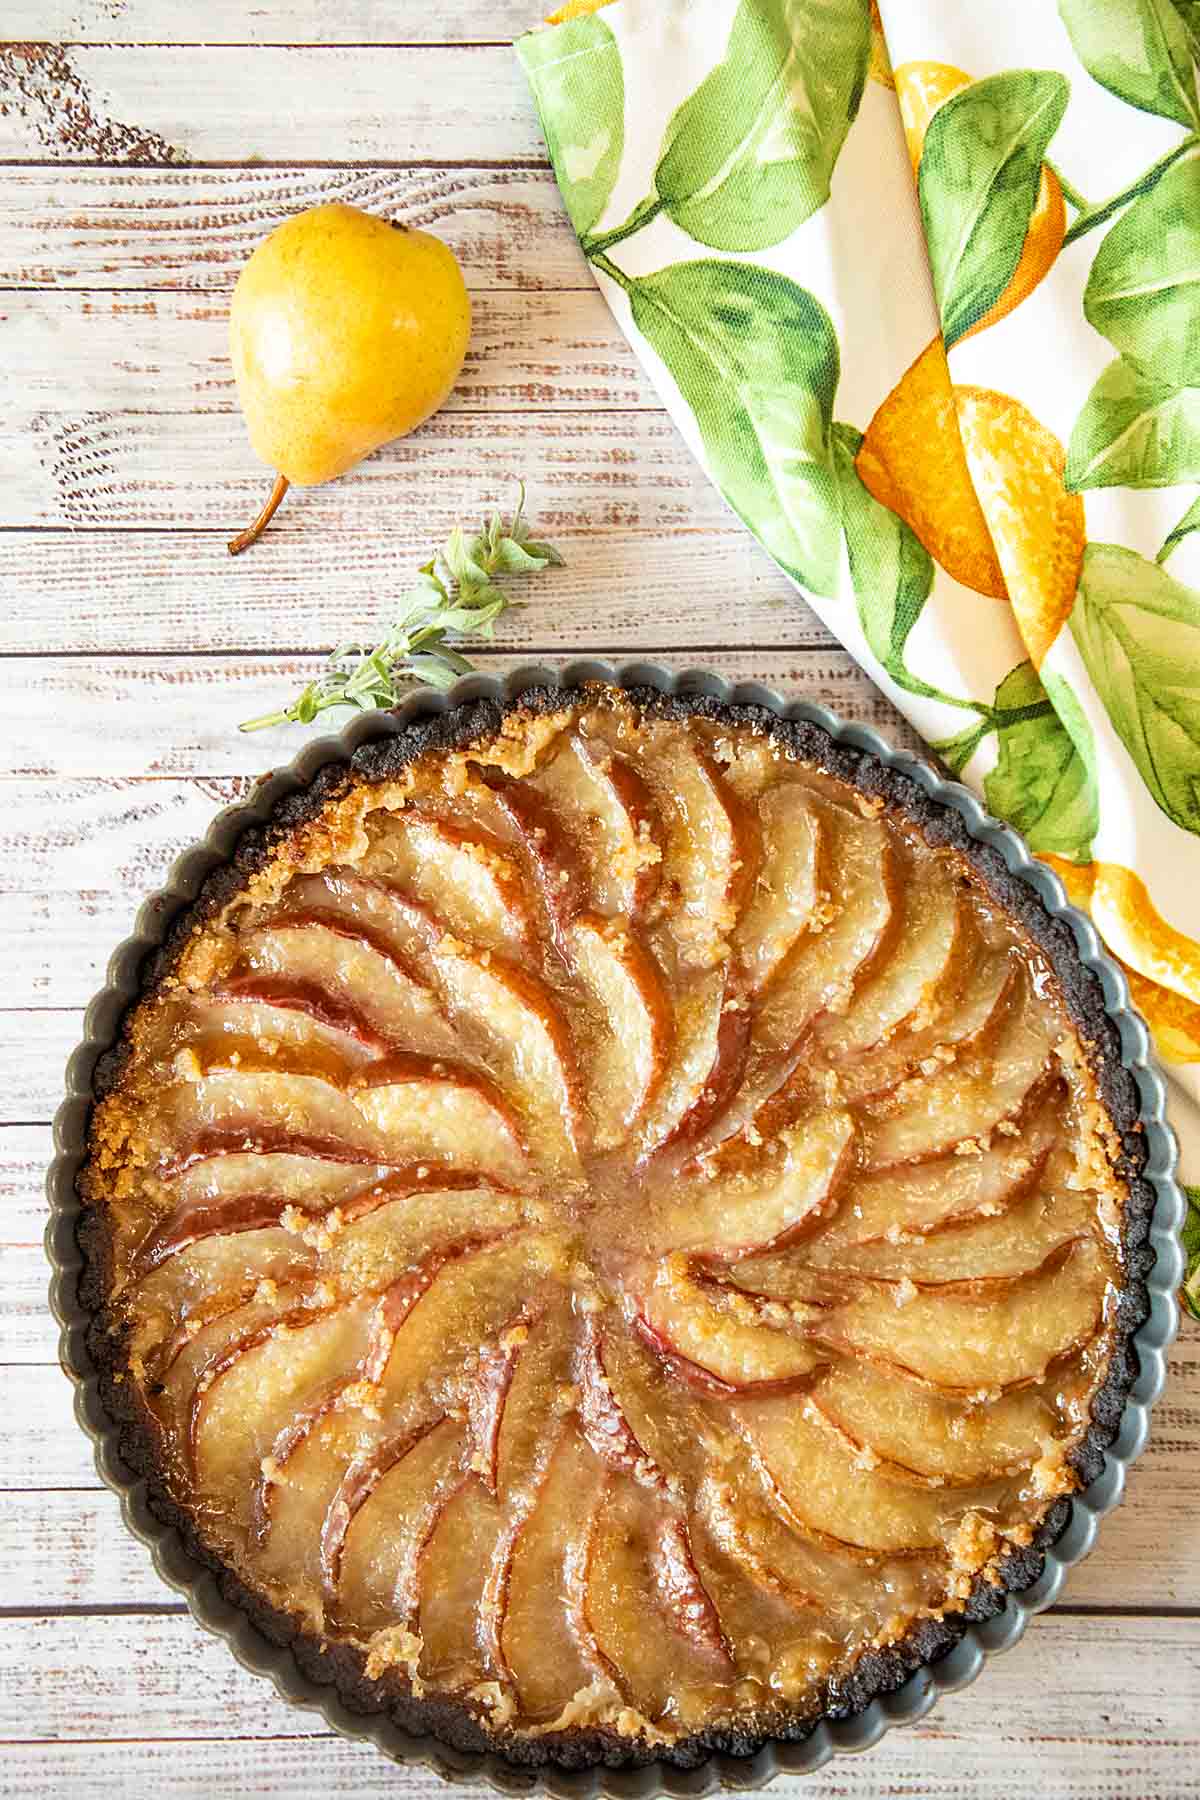
Isn’t it nice when grace and practicality come together seamlessly? The recipe that this lovely, tasty tart is based on came from Food 52 via a now-closed blog and was billed as a 10-minute tart! How good it that! Originally made with peaches, I admit it took me 15 minutes. Still not complaining!
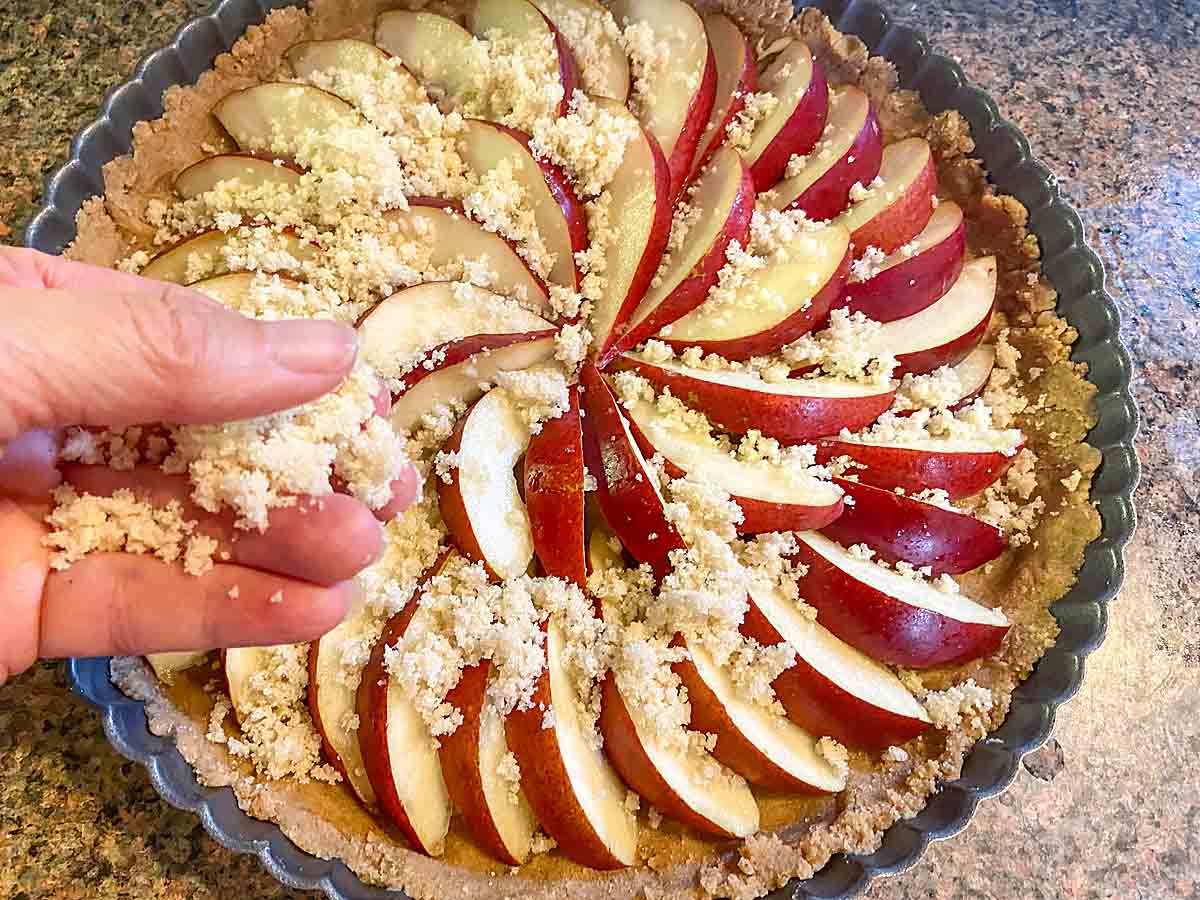
Key to the beauty and simplicity of this dish is the “glaze” that you see on top. It’s actually a simple crumb mix of flour, butter and sugar, combined (use your fingers if you want) and sprinkled atop the pears. Then it melts effortlessly into a glistening lush glaze.
How do you beat a perfect shine that requires no brushing of melted jelly!
What is a French Pear Tart vs Frangipane or Almond Pear Tart?
While defining a tart may not seem like a difficult question, I am actually more confused now than before I started researching. If you google French Apple Tart, you will find recipes that are quite similar to my pear tart–except using apples of course. Sometimes they are very close and sometimes they also add a pastry cream or custard (egg and cream) base.
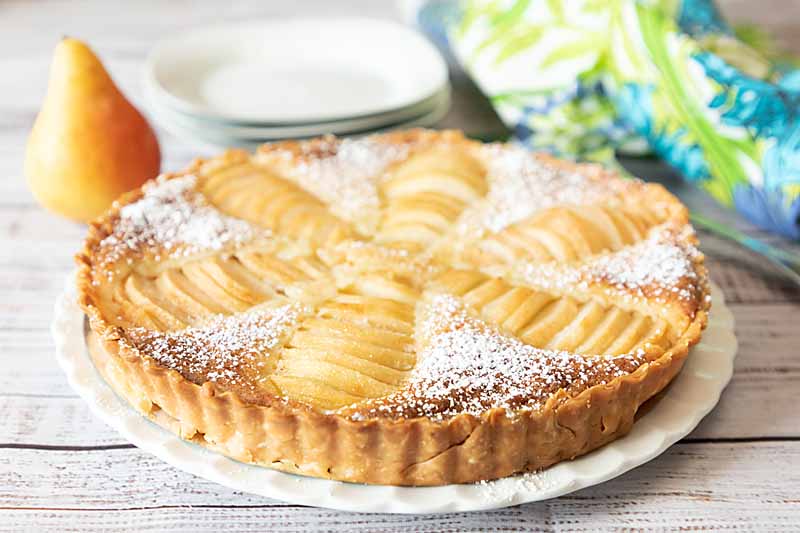
But looking up French Pear Tart usually (but not always) gives you a tart with pears set in frangipane, a ground almond custard. And though I love it dearly, I consider frangipane a VERY different recipe–see here for my Pear Frangipane Tart, pictured below.
Yes, this is the first time I’ve found that simply changing out the fruit used in a recipe–from the French Apple Tart in this case–results in an identity crisis. And now I really don’t know what to call this. Pear Tart, alas, seems simply too generic alone.
Why You’ll Love This!
So Easy. I know we bloggers are always saying recipes are easy, but this really, truly is!
Tasty. I think pears are underrated. All they need is a simple glaze and they really shine!
Impressive. With the lovely concentric circles and the shiny golden glaze, people will think you’re a real pro!
What You’ll Need
Ingredient Notes
- Flour. This is the main component of the crust and also helps thicken the topping. I used half whole wheat in the crust.
- Salt. Adds flavor and may help counter any bitterness from the olive oil (and whole wheat if used)
- Vegetable or canola oil (or butter). This moistens and helps hold the crust together. Using an oil mix will help lighten up the flavor that even mild olive oil can add.
- Mild olive oil (or butter). This moistens and helps hold the crust together. Plus olive oil is healthy and suitable for vegan diets.
- Water or milk. Moistens the crust.
- Vanilla. Adds flavor.
- Sugar. This adds sweetness and shine.
- Margarine or butter. I use butter but vegan eaters can use margarine.
- Pears. The filling. I’ve made this successfully with red pears, yellow pears and the earthy brown Bosc pears. Asian pears (which are very different) would probably not have the moisture content to work in this. See “Variations” below for more ideas.
Special Tools
- 11 inch tart pan, ideally with a removable bottom.
- A food processor is nice but you can mix the crust and toppings by hand without too much difficulty.
Step by Step Directions
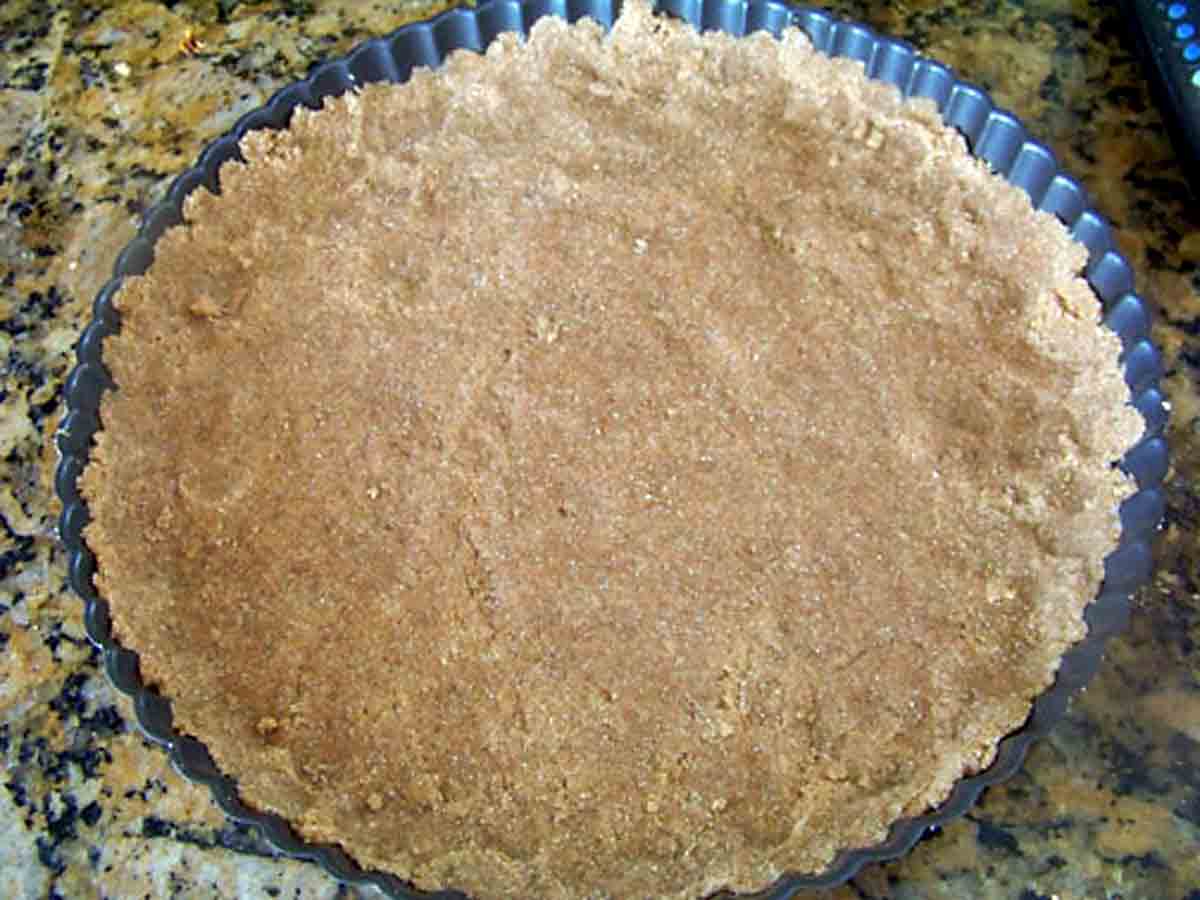
Mix crust ingredients. Press the dough into an 11 inch tart pan till it covers the bottom of the pan and edges up the side. The crust above the “fruit line” tended to brown a lot so going half way up the sides worked well for me.
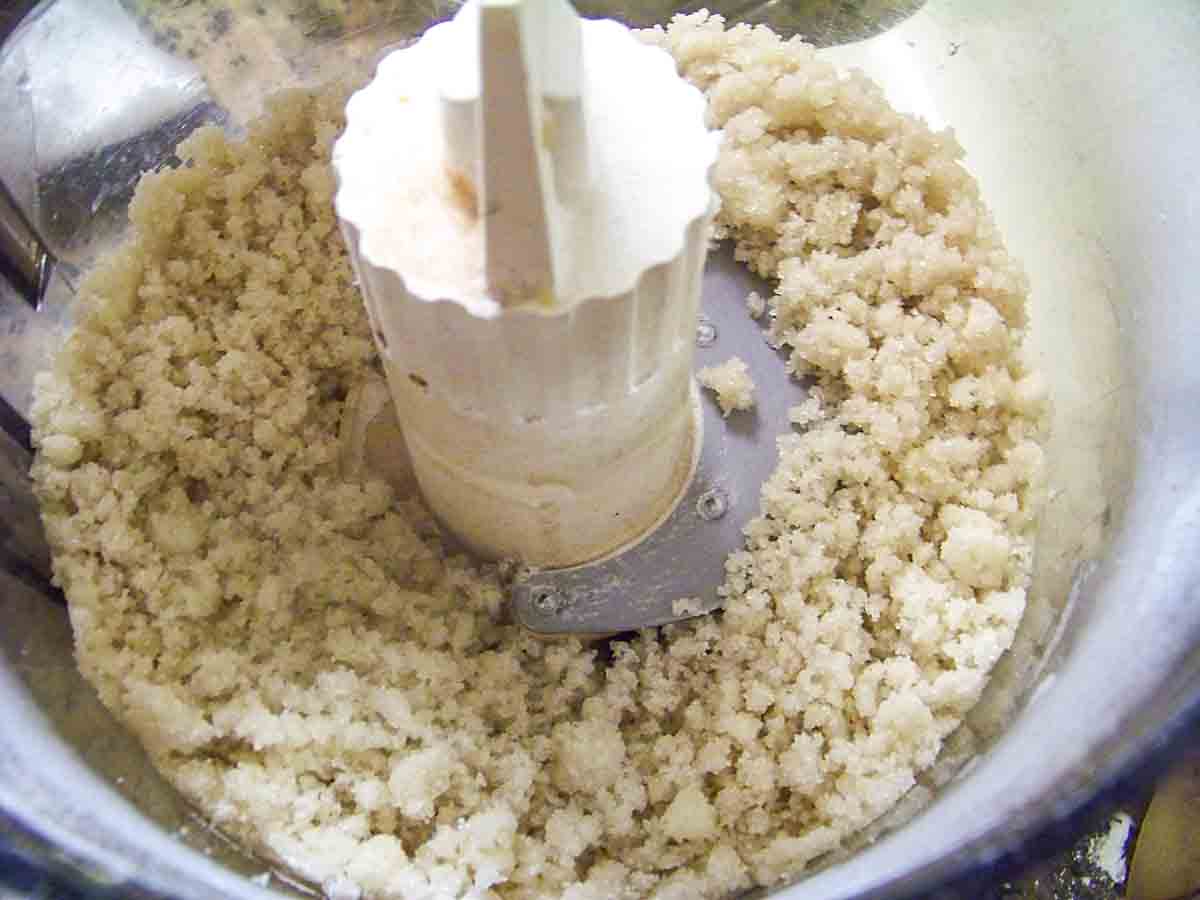
Mix together the crumb topping ingredients.
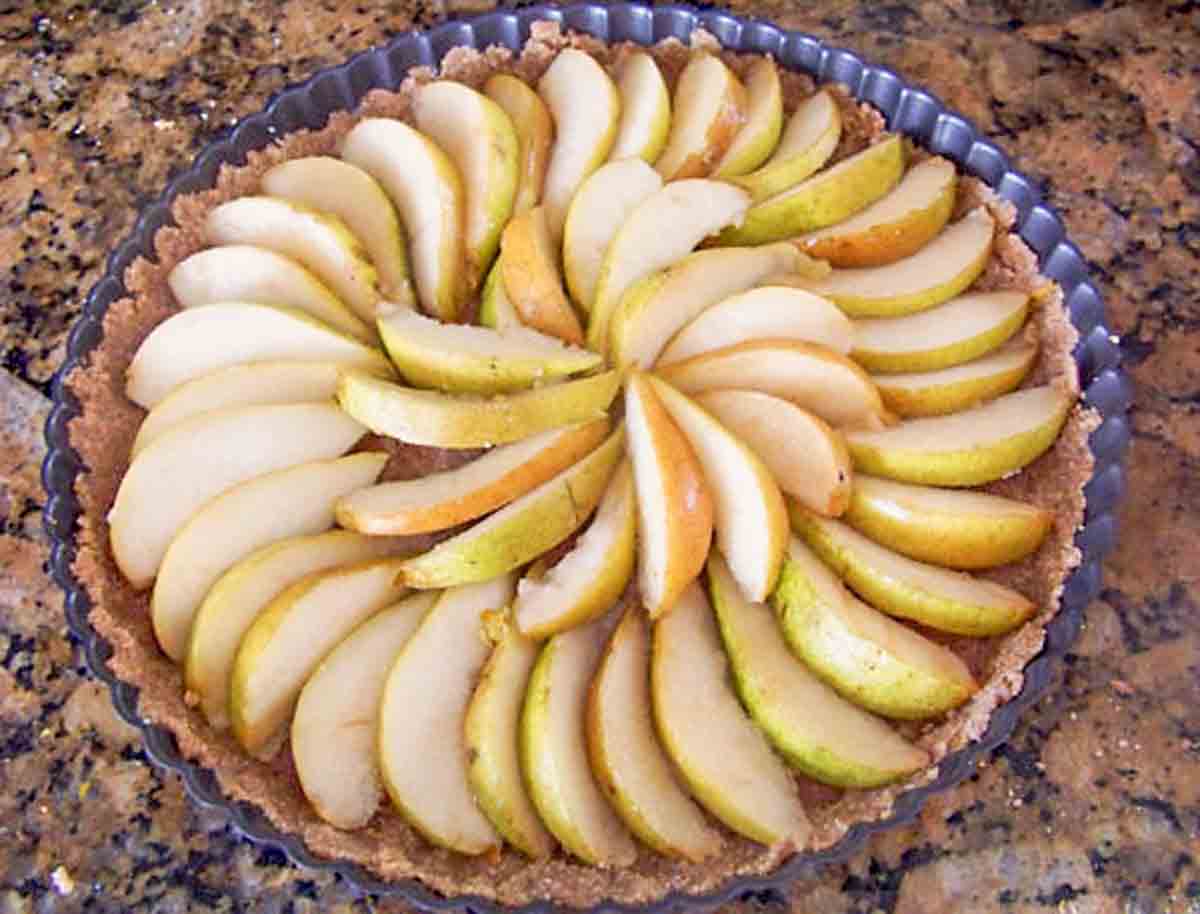
Arrange pears in two circles on the crust, starting on the outside.
Sprinkle the crumb topping over the top.
Bake for 35 to 45 minutes, until glaze is shiny and bubbling and the crust is beginning to brown. Cool on a rack. Serve warm or room temperature.
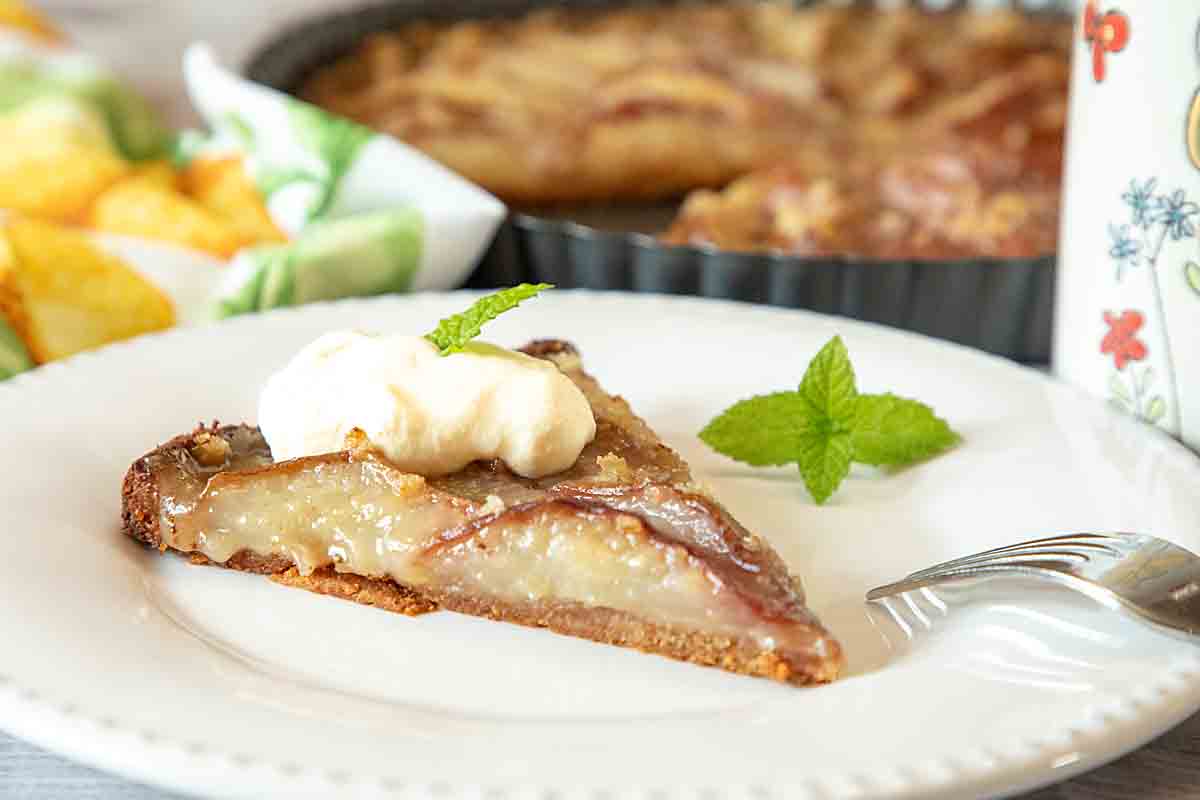
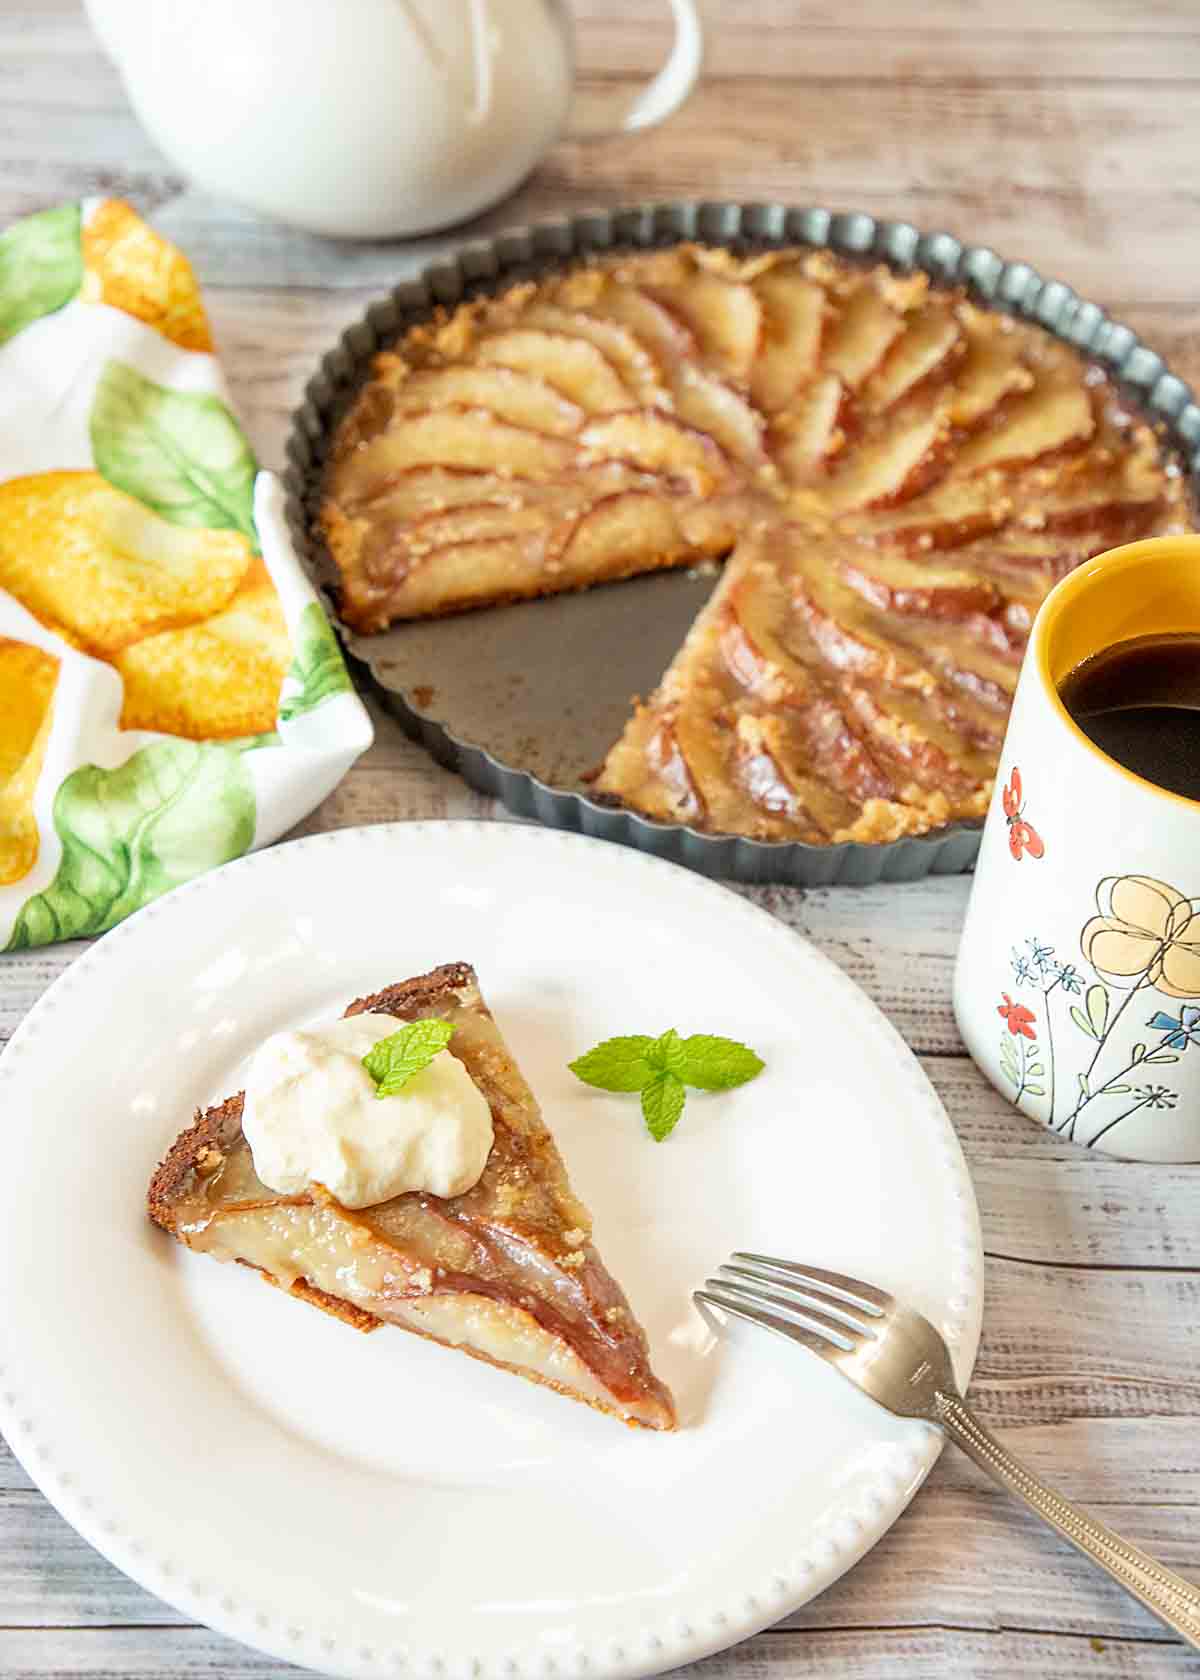
How to Serve
This is a delicious dessert for any dinner or brunch. I like to top with a dollop of whipped cream. A mint leaf can be a nice garnish as well.
I’ve brought this to our Thanksgiving buffet and after an absence of a few years, I think it’s time to bring it back. One pumpkin pie, one apple, one pecan, then the sky’s the limit!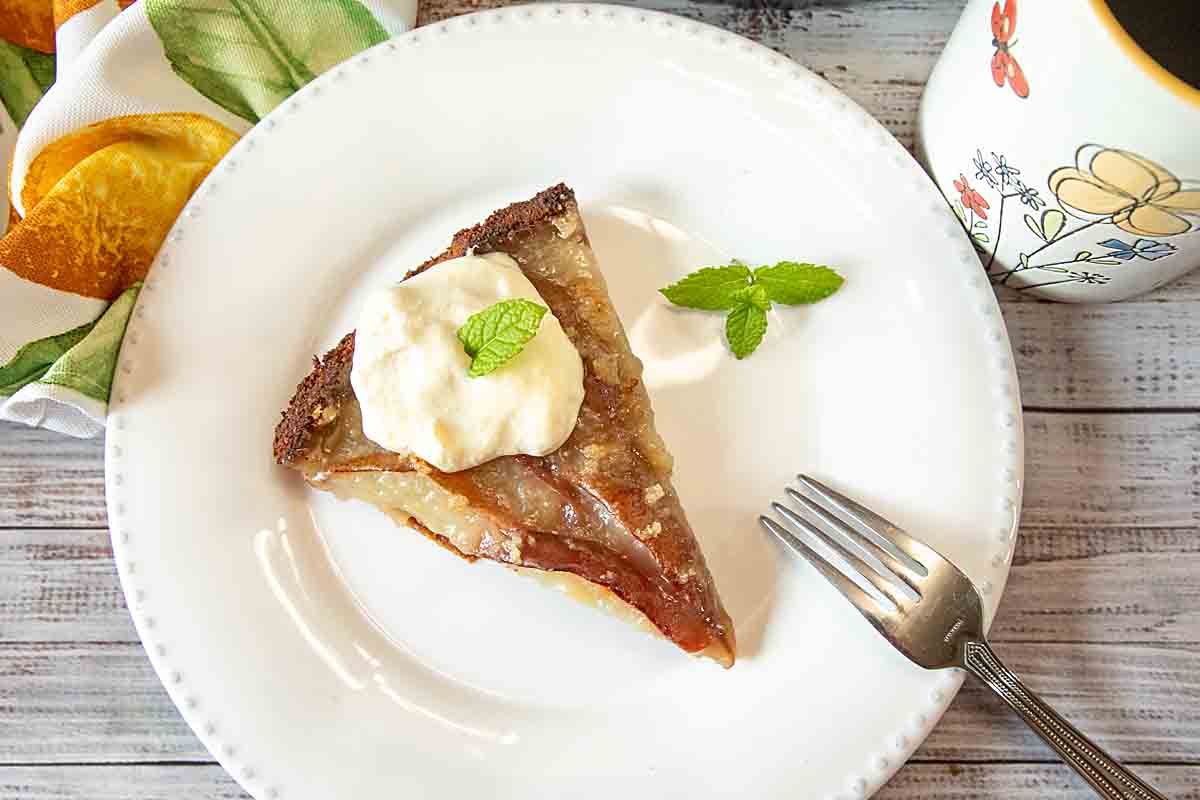
Variations
Happily this is already vegetarian and vegan. To go gluten free you could use your favorite gluten free crust and change the thickener in the topping to a something other than flour.
I’ve also done a version of this as a simple Plum Tart. For that recipe, the main difference is the addition of linzer spices (cloves, cinnamon, etc) to the crust. This compliments the more robust flavor of the plums.
Besides plums, I have also made this successfully with peaches–and failed with apples. The key is that the fruit have enough moisture to help create the glaze.
Now if you’d like to venture into other pear pies, I have a few more suggestions. Consider my Pear Custard Pie another simple but elegant dessert with sweet pears in an eggy vanilla custard, or this Drunken Chocolate Pear Tart which is essentially red wine poached pears set into a brownie-like base.
Preparation and Leftovers
This French Pear Tart is best made the same day you serve it, since it softens some over time. It starts out with a bit of crystallization along the crust that is sweet, crunchy and quite lovely.
For a couple days after, the leftovers are still good (refrigerate after serving).
Tips & FAQs
Don’t shortchange your baking time. That crystallization that I mentioned above requires that the glaze get hot enough (that is bubbly enough).
Do I need to peel the pears? You can peel the pears if you prefer, but I find them nicely soft in the final tart. I am a notorious non-peeler, on principle, but even I admit that my Betty Crocker French Apple Pie is a litttle bit better with peeled apples. But since my kids don’t complain about the peels in this, it really must work.
Be sure to use ripe pears so they have enough moisture to facilitate the creation of the glaze.
And finally, I want to reiterate not to make this with apples because, when I did, the drier apples never released enough juice to form a good glaze. I know I just talked about the similarity to French Apple Tarts but since my apple version failed, I’m sure there are subtle differences. Perhaps the solution’s as simple as thinner slices and maybe some added moisture (Calvados anyone?) but until I succeed, I wouldn’t want to lead you astray.
Though Calvados has me thinking. Perhaps a boozy pear tart would be in order…
10 Minute (Beautiful) French Pear Tart

Ingredients
Crust:
- 1 1/2 cups flour I used half whole wheat
- 1/2 teaspoon salt
- 1 teaspoon sugar
- 1/4 cup vegetable or canola oil
- 1/4 cup mild olive oil see note
- 2 tablespoons milk or water
- 1/2 teaspoon vanilla
Topping:
- 2 tablespoons flour
- 3/4 cups sugar
- 2 tablespoons margarine or butter, cold
Filling:
- 3-4 pears large, ripe, cored and sliced (about 1/3-inch thick)–or peaches, sliced with stone removed.
Instructions
- Preheat the oven to 425. Place a piece of foil or a baking sheet on the lower rack to protect the oven from dripping juice while the tart is baking.
- Make the crust. In a mixing bowl, stir together 1 1/2 cups flour, 1/2 teaspoon salt and 1 teaspoon sugar. In a separate bowl, whisk together the oils, milk and vanilla. Pour this mixture into the flour mixture and mix gently with a fork. Press the dough into an 11 inch tart pan with your fingers till it covers the bottom and about halfway up the sides. The crust above the “fruit line” tended to brown a lot so not going to the top worked better for me.
- Make the crumb topping. Combine the topping ingredients and mix until crumbly.
- Assemble your tart. Starting on the outside, arrange the pear slices in concentric circles over the pastry. Sprinkle the crumb topping evenly over the fruit.
- Bake for 35 to 45 minutes, until shiny and bubbly and the crust is beginning to brown. Cool on a rack. Serve warm or room temperature.
Notes
Nutrition
Originally published Apr 4, 2012
Wonderful recipe – looks as good as it tastes and I have made it a number of times.
So glad you’re enjoying this Liz! Thanks for sharing!
this was the best pear tart. The bottom was tender and flavorful. The pears cooked perfect and the sugar topping was perfectly. One note, I added cinnamon and a dash of cloves to the sugar.
I think cinnamon and cloves would be a nice touch. So glad you enjoyed Molly!
We’ve made this at least 5 times in the past 3 months. It is a BIG winner. Takes more like 20 minutes (nearly half of which are placing the pears) and every minute is worth it!
So glad you’re enjoying this Kristin!
Would frozen peaches or pears work well with this recipe? If so, should they be kept frozen or thawed first?
People have reported using canned pears successfully so I think frozen should work. Normally you keep them frozen if you bake with frozen fruit, so that would be my first thought. They would need to be frozen as individual slices to be able to arrange them–and it would probably increase the baking time. My gut is to do a test pie first if you’re serving company.
Interestingly I’m thinking about trying this with frozen pears myself this Thanksgiving (I bring 5-6 different pies, so can take a chance or two). If you get a chance, I”m sure readers would love to hear how it goes. Good luck!
Loved this pear tart!! My husband claimed it as his new fav and loves it even the next day from the fridge. I used red pears, but they were firm. So I poached them with some vanilla beans and clove, game changer!! This will be a new staple in our house for the holidays, thank you!!
Poaching them first is a great way to use firm pears in this! So happy you enjoyed and thanks for sharing!
Does the tart freeze well?
I don’t think that freezing it after baking would work since it would probably be soggy. Freezing raw, then baking might work. Since it’s so quick to make (realistically 15 minutes working time if you don’t peel the pears), I’ve always gone with fresh.
Thank you so much for this great recipe, it was easy and turned out fantastic. I did substitute the 1/4 cup of olive oil and the sugar for some pear sauce (had too many pears). For the topping I cut back the sugar to only 1/2 cup and will even cut back some more to 1/3 cup next time. I topped the cake with some silvered Almond and covered the cake the last 10 minutes in the oven. This will be my go to recipe and might try it with peaches or apples next time.
So glad you enjoyed! I have tried this with both peaches and apples. The peaches were divine, but the apples were too dry and the tart was dry and not good. You might be able to make adjustments to make the apples work, but I usually just make my French Apple Pie instead 🙂
Thank you so much for answering my comment. The tart are was delicious! as you indicated the crust was just fine. The cooking time was increased to an hour and fifteen minutes.
I just need to ask what you recommend in order for pears to caramelize better. I remember eating these French tart in Paris and a pears were caramelized mine were soft and even though they were not too liquid I would have loved to be able to caramelize them. Maybe I used too many or maybe I cut them too thick? Or maybe I piled too many? I used 3 pears for a 9 inch tart mold (didn’t have a larger one). I will make this tart again, for sure but please tell me what to do in order to have a better with caramelized pears!
A larger tart pan like I recommend would help with caramelization since there is a thinner layer of topping then. In lieu of that, you could try popping the tart briefly under the broiler if your tart pan is broiler safe. Or potentially even baking at a higher temperature should help. Just be sure to check that any crust edge above the fruit line doesn’t burn.
Hope your husband enjoyed his birthday pie! Happy baking!
Hi, I gave you five stars because it’s really easy to make even though is not taking me 10 minutes to prepare but it’s okay. That tart Is cooling down now. I have a few questions: as I was making the crust it looked really crumbly to me like it needed more liquid, I did exactly what you indicated and measure the flour very carefully but I went ahead and tried to put it in the tart mold, second question I used very ripe pears and when I took it out of the oven I can see a lot there’s juice from the pears or is it the sugar? last question is, the topping seems to get a little hard like if it was a caramel or brulee as I said it’s cooling down but I would like to know if that happens and if you can include that in your instructions of things that it might happen so we are not worried ☹️….my husband’s birthday is tomorrow and he didn’t want a cake he wanted a pear tart so I hope the crust is cooked ….actually I left it for a little longer than indicated a 425° F..
If the crust crumbs held together as you formed the crust, it should be fine. Using very ripe pears is good, since they’re nice and juicy and help to dissolve the sugar topping. And if the topping turns soft, then crunchy, I think you have it just right. I do think the pie is best the first day but should be good tomorrow. Hope you enjoy!
Happy birthday to your husband. I’d rather have a birthday pie than cake too!
I started baking only recently, and never made a crust before. This was so good and easy. Thank yu!
It’s a perfect beginner pie Suma! So gold it worked out for you.
What a tasty recipe!
Our friend had quite a harvest of pears and we had way to many to eat them fresh so I tried this tart and we loved it!
As an enthusiastic trier of various recipies, I appreciate the accurate instructions, thanks a lot.
Thanks so muck for the kind comment Lucie! Glad you enjoyed–it’s a favorite of many readers!
Made a GF version in the Wholly GF pie crust. Just substituted Bob’s 1to1 flour in the topping. Reduced the temperature to 400 degrees, 35 minutes. Perfect.
Thanks for sharing Robin. My gluten free readers thank you!
“10 minute tart” however… bake for 40 minutes!!
also, so we peel the pears?
It’s 10 (-15) minutes working time–and that’s if you don’t peel the pears. My mother wouldn’t approve, but I prefer not to peel my apples and pears.
I baked this about 4 more times since my original post. In most cases I used only 1/2 cup of sugar, and once I used 1/4 cup. They were all good but 1/2 cup was sweet but you could taste the pears. 1/4 cup was if there was no sugar used at all. Next time I make it I will try with 1/3 cup.
I once did this with creme brulee to get the egg/cream ratio exactly the way I wanted it. Hope you have lots of friends to help you eat and thanks for reporting back!
I made the recipe as is except I used 6 pears of different varieties and substituted butter and grapeseed oil for the crust. It came out great but to me a bit too sweet—I would like to taste the pears more. I am going to cut back the sugar to 1/2 cup and see how that turns out.
Happily this is easy enough to do some experimentation with! If you get a chance to comment on how the lower sugar version turns out I think others might be interested. So happy you enjoyed it!
Yes, I’ve made the recipe about 4 times since Christmas and my first post. I experimented with 1/2 cup sugar and 1/4 cup sugar. Both were good–I think most people would like the 1/2 cup sugar. 1/4 cup did not seem like there was any sugar, which some might like. I am making it again tonight and decided to use 1/2 cup sugar, but perhaps 1/3 might be a happy medium for me. I will try that next time. But 1/2 cup is definitely delicious. You can taste the pears.
Hi, it’s late at night and craving something sweet! So I found 2 cans of pears in light syrup in the cabinet. Then found your recipe!
This recipe is very simple and easy enough that a beginner baker could assemble. I followed this recipe, but instead of fresh pears I used canned and diced then up. And made the topping and added 1 tsp vanilla and an additional 1 TBS of flour. Baked for 30 min. Wow !!! Amazing!!!
I am so glad you enjoyed this! My goal WAS to do a pie that isn’t intimidating for anyone. And now you’ve got me thinking about the pears I canned last fall…
Thanks for commenting.
This was easy to make and prior to baking was really beautiful. This is likely my fault, but I am posting to see if anyone else has tried. I used monk fruit instead of real sugar. The glaze did not melt browned as a crumb crust that was just too hard as it cooled. I would love any suggestions from anyone who has tried this with monk fruit.
As you’ve discovered, sweeteners do not perform like sugar! And in fact one sweetener doesn’t perform like another since they can be chemically very different.
Now regarding your experiment, since monkfruit does not have the same volume as regular sugar (in other words a tiny amount of monkfruit is very sweet), I expect yours was mixed with another sweetener, likely erythritol. You can check your ingredient label to find out. I have stopped baking with erythritol since I don’t consistently like the results. It can crystalize easily (what you may have experienced), doesn’t brown like sugar and often has a cooling mouthfeel (though sometimes it works just fine).
I am now using allulose (to which I add either more or a few squirts of liquid stevia since allulose is 70% as sweet as sugar) and happier with my results, though I still need to experiment (e.g. you generally need to drop the baking temp by 25F degrees). There are also commercial blends of allulose and monkfruit that I’ve liked. I have not tried this recipe with the substitution yet, since it is so dependent on the proper melting of the sugar, but it’s been on my todo list and I’ll email you if I do. I usually cut a recipe in half when I experiment since the results are unpredictable 🙂
I was recently diagnosed as prediabetic, so I am trying to go through some of my old recipes and test with sweetener — I’ll be updating the posts as I do. And I’ll be doing a series of ice creams over the upcoming year that can be made with either sugar or allulose. So if you like homemade ice cream check back or subscribe!
This looks Amazing with little stress. Thank you for it. I am going to substitute the sugar with Date sugar. It’s a little sweeter than processed sugar, but friendly for anyone having to watch their glucose levels. I’m also going to use coconut oil since the processed ones are over- processed and not good for my indocryn system.
Coconut oil should be fine–I love coconut oil in baking because it has a hint of natural sweetness that is often welcome.
I’m a little more concerned with the date sugar because the sugar in here dissolves in the fruit juices to make the glaze. Since date sugar is really finely ground dates, this is potentially a problem. But if you give it a try, I think readers would love to hear how it works if you get the chance to comment back.
Good luck!
I was delighted to take this pear dessert to a small fall party. I got to use these backyard pears, that were as easy and pretty tasty as I had hoped. So, I felt proud to bring them. Want to try variations to this recipe. Thank you.
So glad you enjoyed this Bev! Yes, as I mention we have enjoyed this with peaches and plums (the big ones–the tiny plums didn’t work as well) too! Thanks for sharing!
I have some Asian pears from my CSA. They’re still quite firm. How would recommend soaking them and what liquor would you use? Will this technique give them enough moisture to work with the recipe? Sounds delicious, I would love to try it. Thanks
I fear that Asian pears are likely too dry for this recipe and you’ll end up with an experience like when I tried using apples. So I would eat them fresh or go with a recipe designed for apples–perhaps my French Apple pie at: https://artofnaturalliving.com/original-betty-crocker-french-apple-pie-with-an-efficiency-trick/ which is quite easy as well. Hope this helps.
Delicious! Super simple to make and absolutely fabulous. I used coconut oil in place of the other oils and the crust was perfect. I used a 1/4 teaspoon to core the pear before slicing.
I love the 1/4 teaspoon trick to core a pear! So glad you enjoyed this!
I want to try this but don’t see the measurement for each ingredient. Not an experienced enough bake to guess.
You need to look down to the end of the post for the actual recipe, Barbara. The initial information is there more for understanding substitutions and because some people like to see an early ingredient list (people complain if it isn’t there). There is even a “jump to recipe” at the top of the post if you want to get there quickly. Let me know if you have a problem finding it.
Can this tart be frozen? I received several pears as a gift recently and I am wondering if I can make this to use them up and freeze it for a later date. I don’t want the pears to go to waste.
It looks delicious.
Thank you.
I have never tried freezing the tart, but I can tell you that pears freeze beautifully. I slice and core, then freeze the slices on a baking sheet so they freeze separately. I don’t peel them and I usually line the baking sheet with wax paper or a dish towel to keep the slices from sticking. Then when hard, I put them all in a big zip loc or old plastic ice cream tub. Then I can take out whatever I need all winter. Also great for smoothies and my Pear Custard Pie. Hope this helps!
This is by far the easiest but most impressive dessert I have made! Thanks for sharing.
Hi Inger,
Just a question — some of the ingredients don’t say teaspoon or Tablespoon … mainly wondering about the amount of vanilla — I assume its teaspoon. Can you clarify? Thanks!
“t” is actually the abbreviation for teaspoon. I usually write them out because I’ve seen it confuse people before. This is an older recipe (updated) so maybe that got missed–going in to update now.
Super excited to try this pear tart recipe!
Questions: Is “light olive oil” just what it’s called? I haven’t noticed before in the supermarket.
Thank you and sincerely,
tad blake-weber
You might see something called light olive oil, refined olive oil or pure olive oil. What you need to avoid is extra virgin olive oil or virgin olive oil. These will have a lot of the distinctive olive oil flavor and that will detract from the tart flavor. If you don’t want to buy another oil you can substitute canola oil or another oil that doesn’t have a lot of flavor.
can you use a ready made crust
As long as you place the crust into an 11-inch tart pan I think it should work (although I’ve never tried this). You will almost certainly need to shield the edges of the crust once it has browned to keep them from burning. A standard commercial crust can be rolled out more so that it fits an 11-inch tart pan–this I do regularly! Or you could make a graham or other cookie crumb crust as well.
I made this Tart… it was delusions. I followed the receipt and I prepped everything and then put it all together. It came out nice and shiny and delicious.Thank you , I’ll be using this receipt for any time I have pears.
I followed your recipe exactly but when l went to slice my pears 2 of them were bad so l used plums instead. It turned out beautifully. Wish l could post a picture.
My dad has pear trees, so I make this often when the pear trees are bearing fruit… I have made a few modifications. I make it in individual tart pans, I use lemon flavored olive oil, makes the crust taste like a light lemon cookie … also sugar free, for the sugar I use Splenda brown sugar!
Huge success with the filling. Disappointed with the pastry. Used the only tart pan I had which was 9″ and it wasn’t as thin as the piece in your photo shows. Also, I wonder if you could expand on “light” olive oil. Maybe mine was not light. That flavor and the whole wheat flour are new to my pastry palette.
That’s a great idea to discuss the different types of olive oil–I’ll put that in the queue. Even people who do olive oil regularly may not be used to baking with it. If your crust tasted like olive oil, it probably wasn’t light, since light olive oil is more neutral like canola oil. Once I used extra virgin olive oil when it was all I had and didn’t love that myself.
The crust is designed to be both super easy and healthy, so there is a little flavor compromise compared to a flaky buttery crust or a pale sweet crust. But I think that people who eat whole wheat regularly will probably not be bothered by it–I know my kids will gobble down things made with whole wheat that my nieces pick at. If you used a 9 inch pan, the extra thickness would intensify this, since the filling isn’t all that thick to overcome it.
If you do want to move toward more use of whole wheat in the future, a good way to start is by using white whole wheat, which has all the nutrition but a less intense flavor (and I may switch this recipe to that–it dates back many years to when it wasn’t readily available) or by using a combination of all purpose flour and whole wheat. And of course you could always use the filling with your own favorite crust. I even use the filling (cut down in size) on puff pasty as a breakfast danish.
I made this with a bag of pears that my neighbor gave me from her tree. I waited until they were super ripe and juicy. I followed the recipe exactly and added cinnamon and cardamom to the crumble topping and it turned out great! Super easy and delicious!!!!
This is my go-to recipefor a pear tart I have made it on 4 different occasions and it has always been a big hit. I’ve used both fresh (we have a pear tree) and even home canned pears. Worked beautifully ever time. The crumb topping is my favorite feature. No fuss glaze that adds a slight crunch to each delicious slice.
well, why does a “10 Minute (Beautiful) French Pear Tart” take an hour to make?
This refers to the working time, not the baking time, which adds 45 minutes. As I explain in the first paragraph, it was called this in the original recipe, though it took me 15 minutes my first try. It’s an elegant pie with minimal effort so I hope entices new bakers to give it a try.
I followed your instructions to the T, except for the sugar which I reduced slightly and used brown sugar instead of white. The prep time was quick enough, but peeling and cutting the pears took up more of my time- especially since I was gobbling down the rough skinned peels!!
Delicious results! Topped with Greek yogurt and a thin drizzle of honey!!!
So glad you enjoyed this! And glad to know this works with brown sugar too. I don’t peel my pears, so that saves me some time, though I think I’d enjoy eating them if I did–cook’s reward! You’re an inspiration topping with Greek yogurt!
Anyone try canned pears? Assume extended draining needed but they’re ripe and already peeled! Curious if comments?
I did have a reader mention using canned pears with excellent results. I think you’d need to drain them well first. I haven’t tried it myself but I just canned come pears and may try it this winter. I’ll report back!
You mentioned a “boozy” pear tart. At what point would you add liquor?
I would probably slice and soak the pears overnight, then drain and use in the tart (saving the liquor, of course!). Or I might use my alcohol preserved fruit (for more on this, see https://artofnaturalliving.com/boozy-fruit-oldest-preserves-brandied-plums/ ) though those get pretty intense! All fun!
Thanks for sharing this informative article it is very helpful for me. (The Foodiey)
Hello! Is there a “print” button on this page somewhere? I’d like to save it by printing, but I can’t print several pages.
Hi Kasia–
Since this is one of my older recipes, there isn’t a button, since I just used all text back then. You can always do a Control P on a PC, or Command P on a Mac which will let you print the whole post. I’ll try to get in set up with a print button, though, then email you. Thanks for alerting me that people might be looking for this.
My first Pear Tart and it came out beautifully! I couldn’t believe how easy it was. My pears were ripe and juicy and the crumb topping made a delicious sweet sauce when mixed with the juice from the pears! I’m in love with this recipe. I made it exactly like the recipe except I didn’t have a tart pan so I used a springform pan!
That was my exact reaction when I tried it! So glad you enjoyed it Cynthia!
This was delicious as per my guests, who ate it. My kids are vegan or vegetarian and it was a big success. I made two for 17 minutes, not counting the time to cut the pears. I’m making it again today!
P. S. I am a carnivore, so I haven’t tried it myself
I eat meat and I eat this Milena! So I think you should go for it and have a piece of today’s tart! Thanks for sharing the feedback!
Will canned pears work in this? Hard to get juicy ripe pears this time of year.
I think they might if you drained them very well first. I would put them in a strainer or colander sprinkle with a little sugar then let them sit for an hour to extract somoe moisture. Let me know how it goes if you get a chance. Good luck!
The topping did not melt nicely – I don’t know what I did wrong, but it took much more than 305-45 minutes.. and it just burned on the top and nothing close to the picture
For this to work, the fruit needs to be pretty juicy, which isn’t usually a problem with pears–and I have used peaches as well. But the one time I tried apples, the topping turned dry and crunchy. I took it out in at the right time then so didn’t have a problem with burning, but I wasn’t happy with the results. It would seem that if your pears were not fully ripe, it might be a problem being too dry. I assume you tried cooking longer in the hopes the sugar would melt, but that would probably make it dry out worse. Less likely causes could be your oven running warm, or not being up to temp wen you put it in. Feel free to write back to discuss more if you want to try again.
I made this tonight with some adjustments. It was Fabulous!!! I used pear and peaches, 1/2 cup veg oil (no olive oil), 1 full Tsp of vanilla and milk (no water). Oh and I made it in a glass pie plate with no issue. Yum Yum Yummy!
I am so glad you enjoyed this–and thanks so much for letting me know. I am always amazed at how the fruit “juices out” to make a lovely glaze (with no work on my part 😉 )
Pingback: Plum Tart with No-Roll Linzer Crust « Art of Natural Living
Pingback: “Cinfully” Cinnamon Apples « The Modern Magnolia
This looks simply scrumptious!
Thanks. I actually bought a second tart pan after this!
Pingback: Artisan Beer Cheese Fondue « Art of Natural Living
this is a glorious tart! not only is it majorly impressive to behold, but i’m sure it tastes incredible!
You know the oil in the crust definitely gives it a different flavor, but I liked it enough to have made it a few times already (the speed of preparation doesn’t hurt either). I may experiment with a butter based crust too–if so I’ll post in the future.
And all of this took 10 minutes?!
The original blogger did it in 10 minutes–and I am definitely going to try to hit that goal when I make it again. My first time took 15. One thing that I have been doing in recipes is mixing ingredients that need to go to a “crumb” texture by hand. I think this is pretty efficient and easier than a pastry blender for a relative novice.
This is beautiful! I cannot wait to try this, I am sure that my kids will love it too!
Hope they enjoy it–I love exposing kids to new dishes!
Oh my goodness that looks delicious and as you say at even 15 minutes it’s quick!!
I was going to see if I could get it down to 10 minutes the second time I made it. But since I was taking pictures for the blog then, it took longer : ( But I’ll definitely be trying again!
Looks lucscious….
Thanks! I’ll make it next time we get together if I have the pears.
10 minutes? Bookmarked!
Have you tried Pinterest for tracking on recipes–I am really enjoying it…
Hi only just came upon this recipe tonight. Can I substitute melted butter instead of oil? If so, would I use the same amount of butter as for oil? I’m so eager to try this. Thanks
I think you should be able to use butter but it may have more tendency to burn so be ready to loosely lay a sheet of aluminum foil on top if that happens.