Homemade Dried Fruit Worthy of a Cheese Board
Homemade dried fruit can be a nice addition to a holiday cheese board, especially apples and pears cut lengthwise. Get easy step-by-step instructions here! 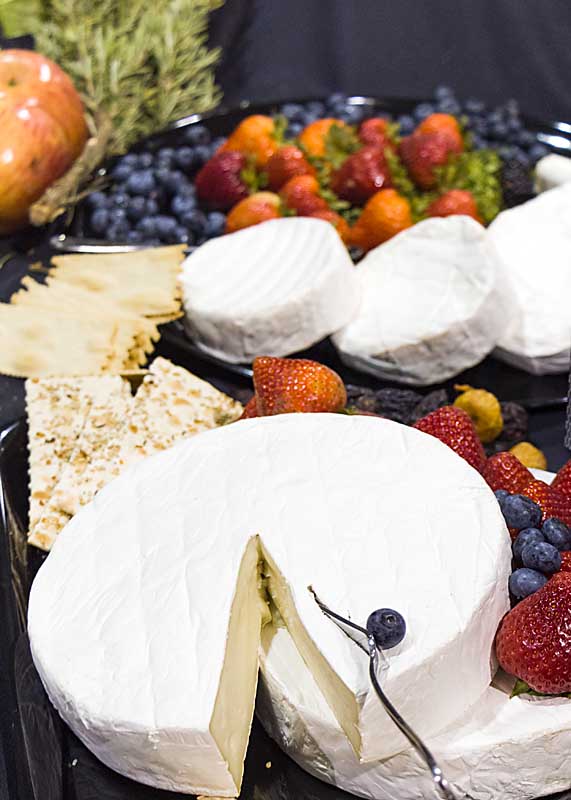
‘Tis the season for festive food! And nothing says “Cheers” quite like a cheeseboard!
And while twenty years ago, a platter might hold a couple cheeses and some crackers, today’s cheese boards are lavish! Charcuterie, nuts, pickled vegetables, olives, jam, dried fruit. The more the merrier!
Of course, for the very best display, not all dried fruit is created equal. When it comes to apples and pears, wedges are a nice addition. But cut them full length or width and they start to look gourmet.
Making Homemade Dried Fruit
You might be surprised how easy making homemade dried fruit is! Here are step-by-step instructions.
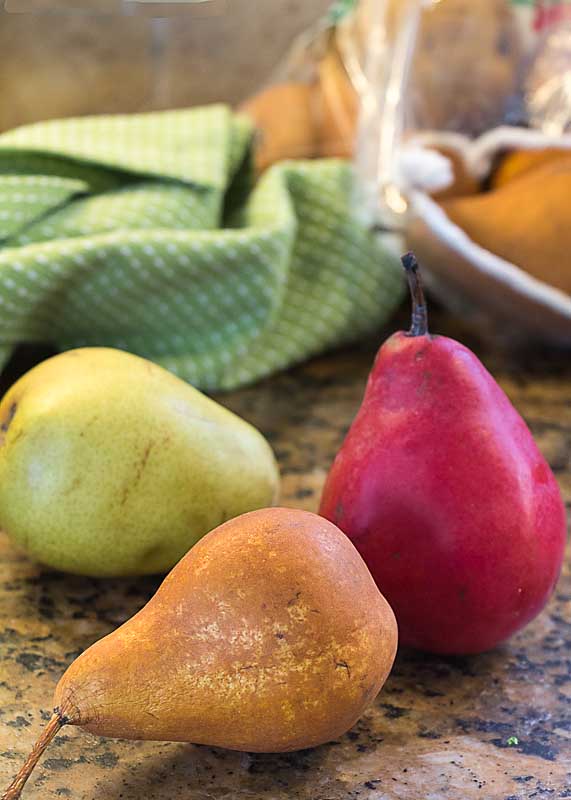
Your ideal fruit for dehydrating is ripe but firm.
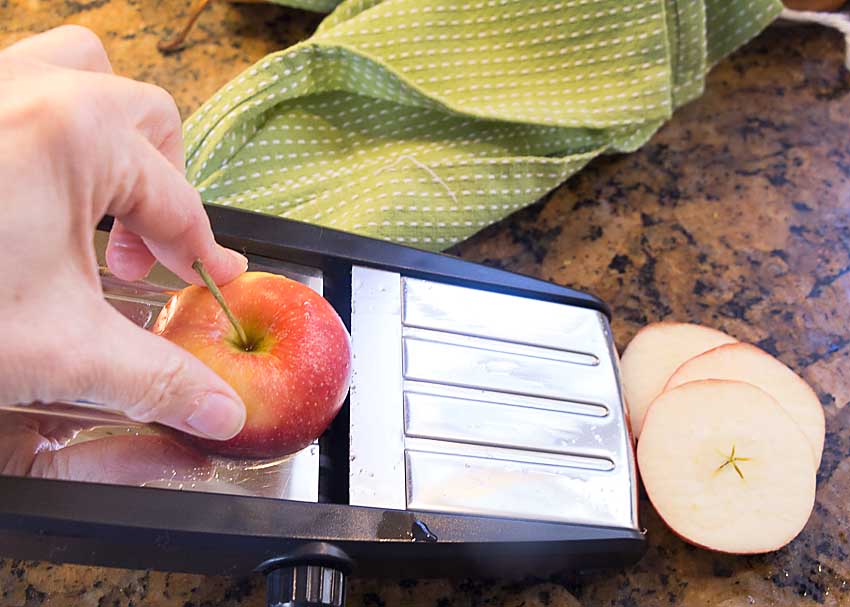
Using a mandolin set at ¼ inch, cut cross-wise for apples.
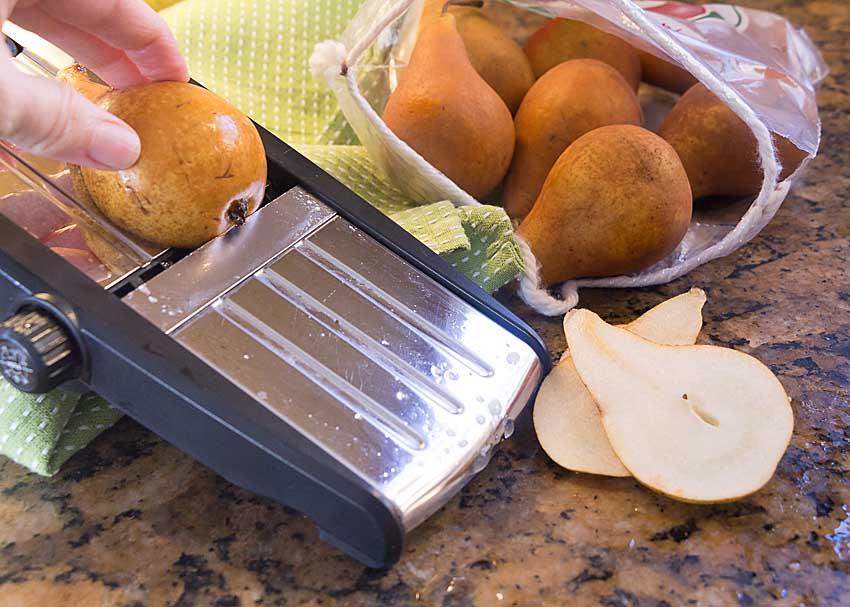
Or lengthwise for pears. Other fruits will work in 1/4 inch pieces as well.
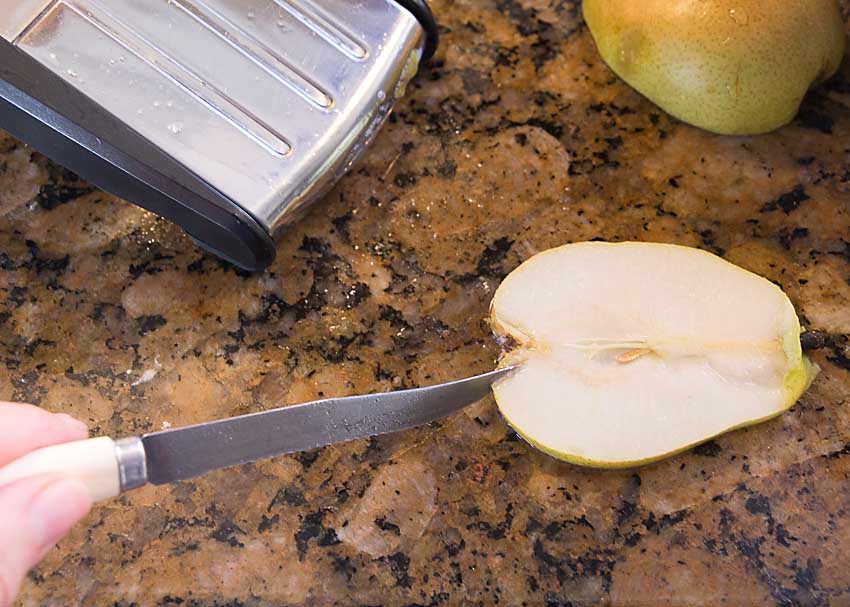
Remove seeds (they are mildly toxic, plus unappealing) and cut off the blossom end. Stems can stay!
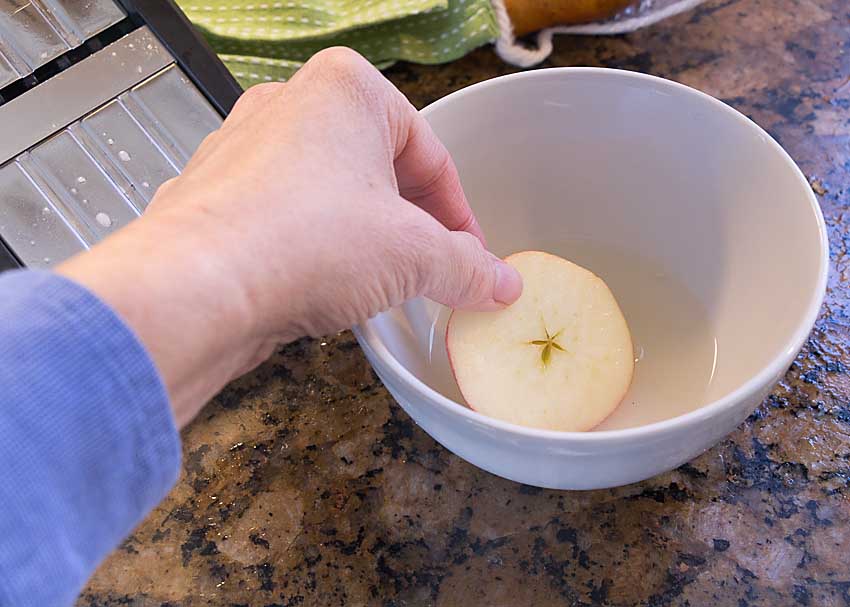
Dip apple slices in tablespoon of lemon juice mixed with a cup of water to inhibit browning. Most other fruits are okay plain.
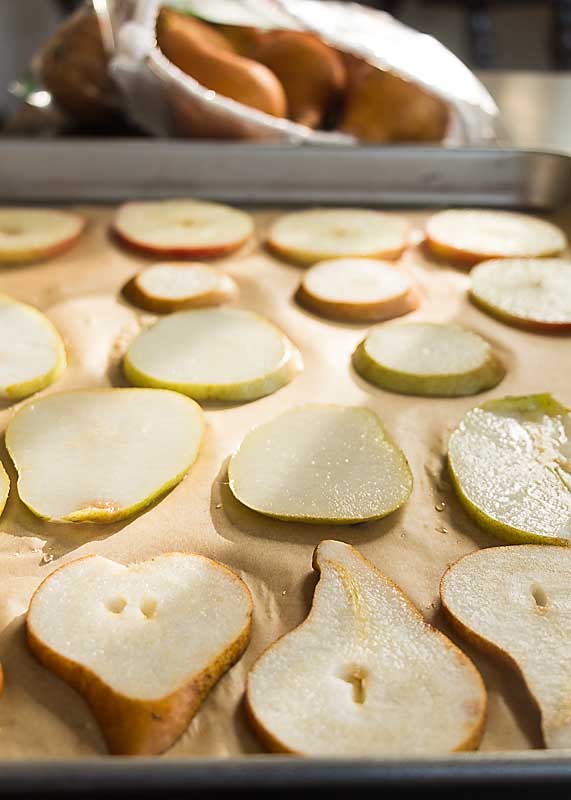
Dry in dehydrator on mesh sheet for best airflow. Alternatively, place on parchment-lined baking sheet (or on a rack) and dry in oven at 120-140 or your closest setting (often 170). Flip fruit, bottom side up, part way through so bottom has a chance to dry.
Fruit is ready when until pliable but not damp. Eat within 6-12 months. 
Should I Buy A Dehydrator
As I discussed, it’s possible to make homemade dried fruit in an oven, but a dehydrator is my recommendation–if you are actually going to use it. I use mine every year to dry tomatoes, apples, pears and sometimes herbs and I’ve even rescued mealy peaches by drying them! My dehydrator lives in the basement when I’m not using it, so doesn’t take up valuable kitchen space.
What are the advantages? If your oven’s lowest setting is 170 F, like mine, oven-dried fruit can take on more of a “cooked” flavor. In addition, the oven requires more watching and doesn’t have a fan to enhance moisture removal. Finally, it uses more energy and can’t handle as much volume as a fully stacked dehydrator.
But if you are on the fence, try some homemade dried fruit in the oven first. It’s lots of fun and can help you have a touch of summer all year.
Or a kick-ass cheese board!
I’m going to try the oven version. I don’t think I can buy another plants without getting into a messy divorce … I have had a lot of success drying tomatoes in the oven, but never have tried fruit. Thanks for the suggestion – I love dried fruit with cheese as much as the next guy. (We must have the same oven – 170° is my lowest…)
My sister, who is gluten free, will use a nice fruit slice like a cracker even. I think the 170 F thing is a (silly) safety measure since that’s the lowest temperature considered safe for keeping something warm.
Sorry for the typo…I meant Thanksgiving…
Where’s autocorrect when you need it 🙂
Wow Inger, how fun, making your own dried fruit…and yes, perfect for a lovely cheese platter…thank you so much for the idea.
Happy Thanksfiving!
I really should get into the habit of drying fruit. I use so much of it for our granola 🙂 Thanks for the prompt.