The Lazy Person’s Potato Garden
What’s an easy and fun activity for your backyard (potato) garden? Growing potatoes in potato cages or towers!
Growing potatoes always sounded hard. Dig a deep bed, “fluff up” the soil (especially painful with clay), then go back with the shovel for harvest.
I am a lazy gardener. I started my gardening career at roughly the same time as my corporate career, so if it wasn’t easy, it wasn’t going to happen. This spoiled me for life.
Why Grow Potatoes in Cages
This is why, many years ago, I decided to make a potato garden, in cages. It requires (almost) no digging—to prep or to harvest—and as an added bonus, they are ready weeks before most local potatoes. With membership in two CSAs, I am buried in food by fall but let me harvest something weeks earlier and I am so there. It’s tough to be a fresh food junkie.
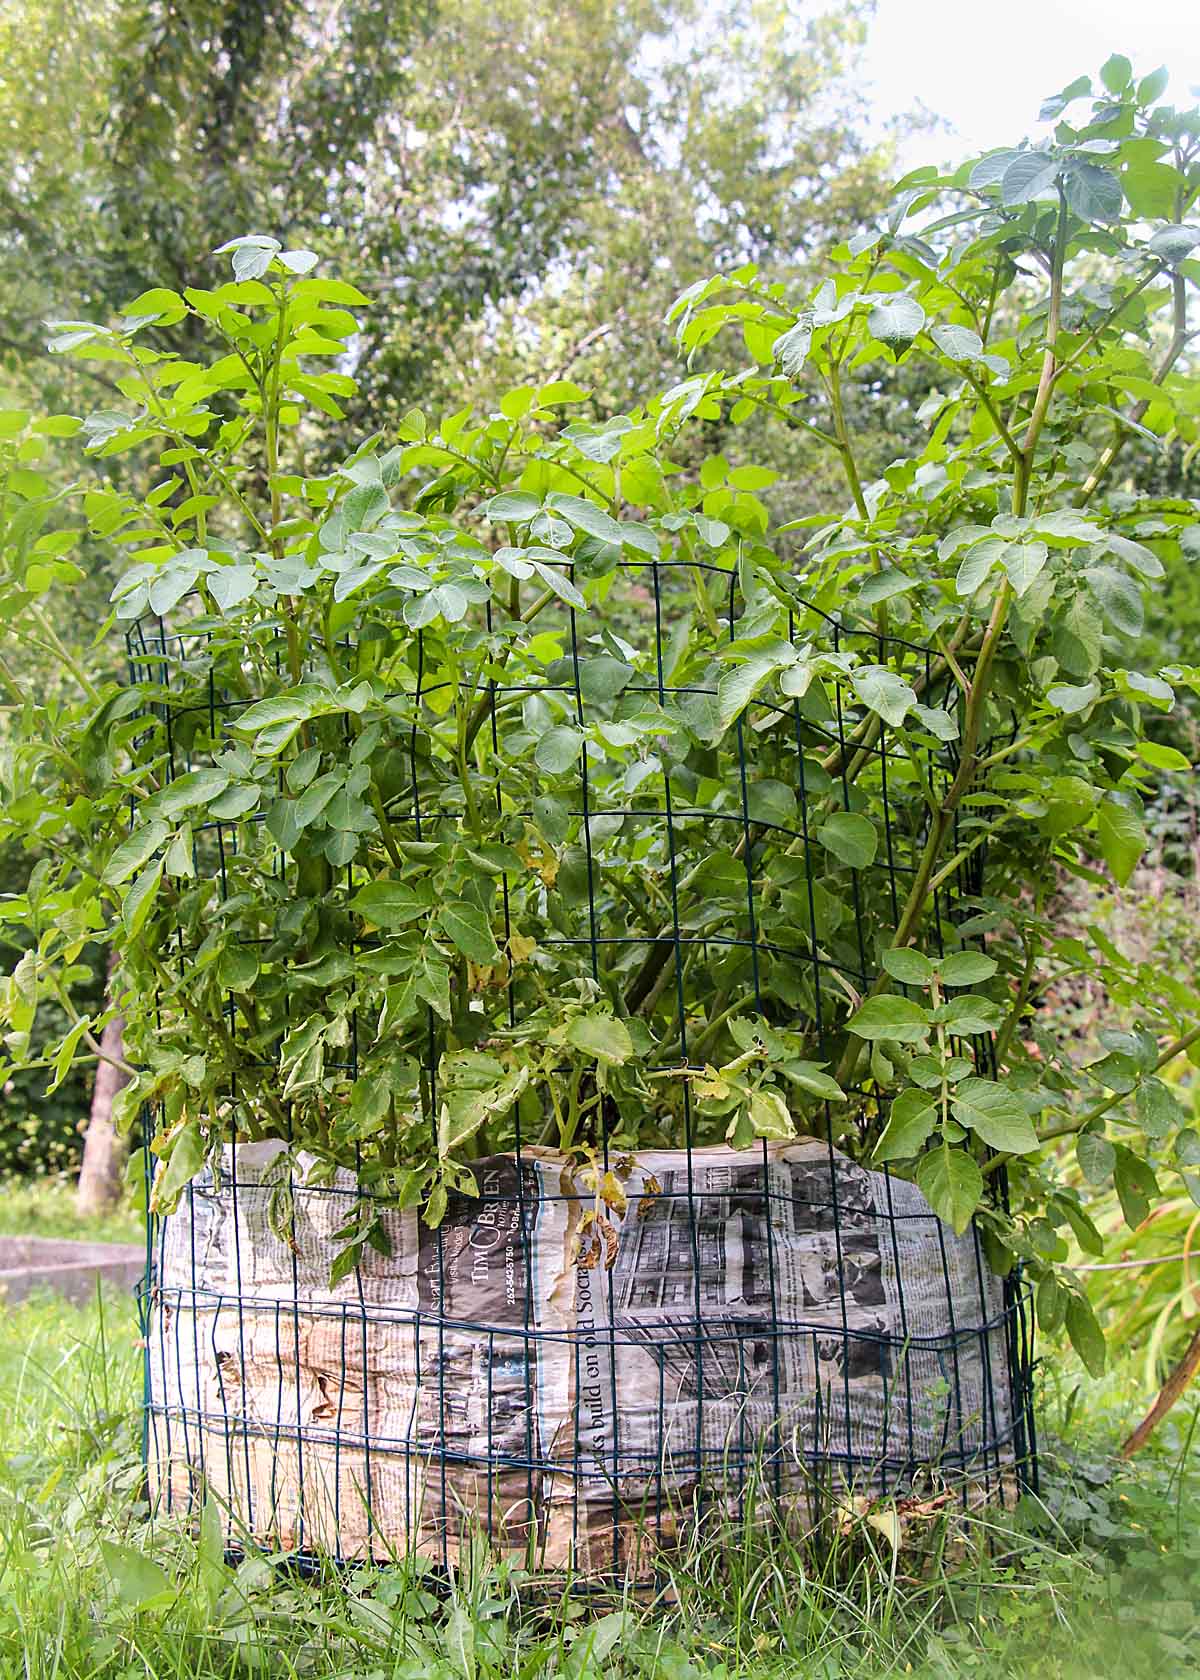
Growing potatoes in cages is easy and space efficient. A little known fact about potatoes is that if you mound additional soil around the plants as they grow, they will continue to add spuds upwards in the new dirt. By growing vertically in cages, you can get a nice crop in less space and it is easier to harvest. Just remove the cage, loosen the soil, and pick out potatoes.
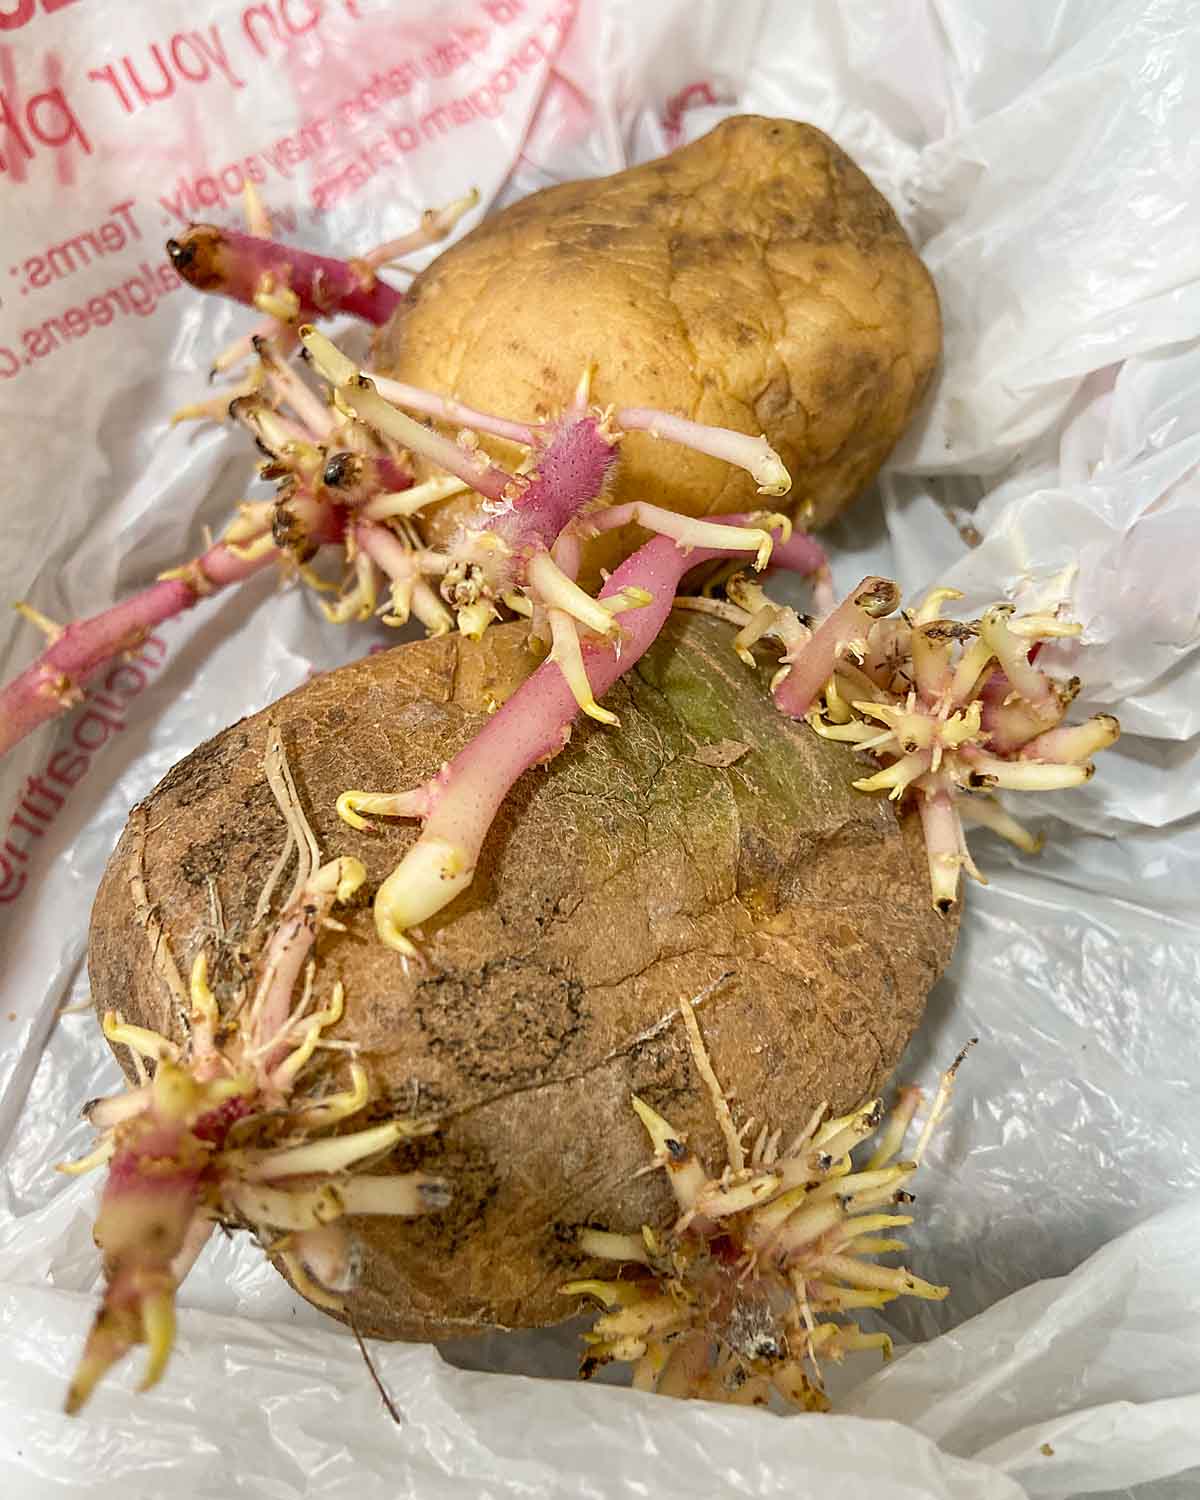
As a laziness bonus, I don’t buy seed potatoes. By late April, the few remnants of last year’s harvest have sprouted and are starting to shrivel. Anything moldy get tossed into the compost bin (which has been known to grow an occasional potato crop itself), but those that still look reasonable go into my cages as the foundation for the new crop.
How to build the cages
If you’ve ever built tomato cages the process is pretty similar, just a slightly different scale. We reuse the same cage for a number of years (yup, another lazy bonus) and construction is simple.
We reuse the same cage for a number of years, and construction is simple. My husband cuts a 7 1/2 ft length of wire mesh and folds the top over to shorten it without leaving sharp ends. Then he circles the sides together and secures them with wire (or sometimes he just twists the cut ends together).
The final model is about 2 ft in diameter and about 2 feet tall.

Potato Cage Ties
Step by Step Instructions for Planting
Here is how the planting goes:
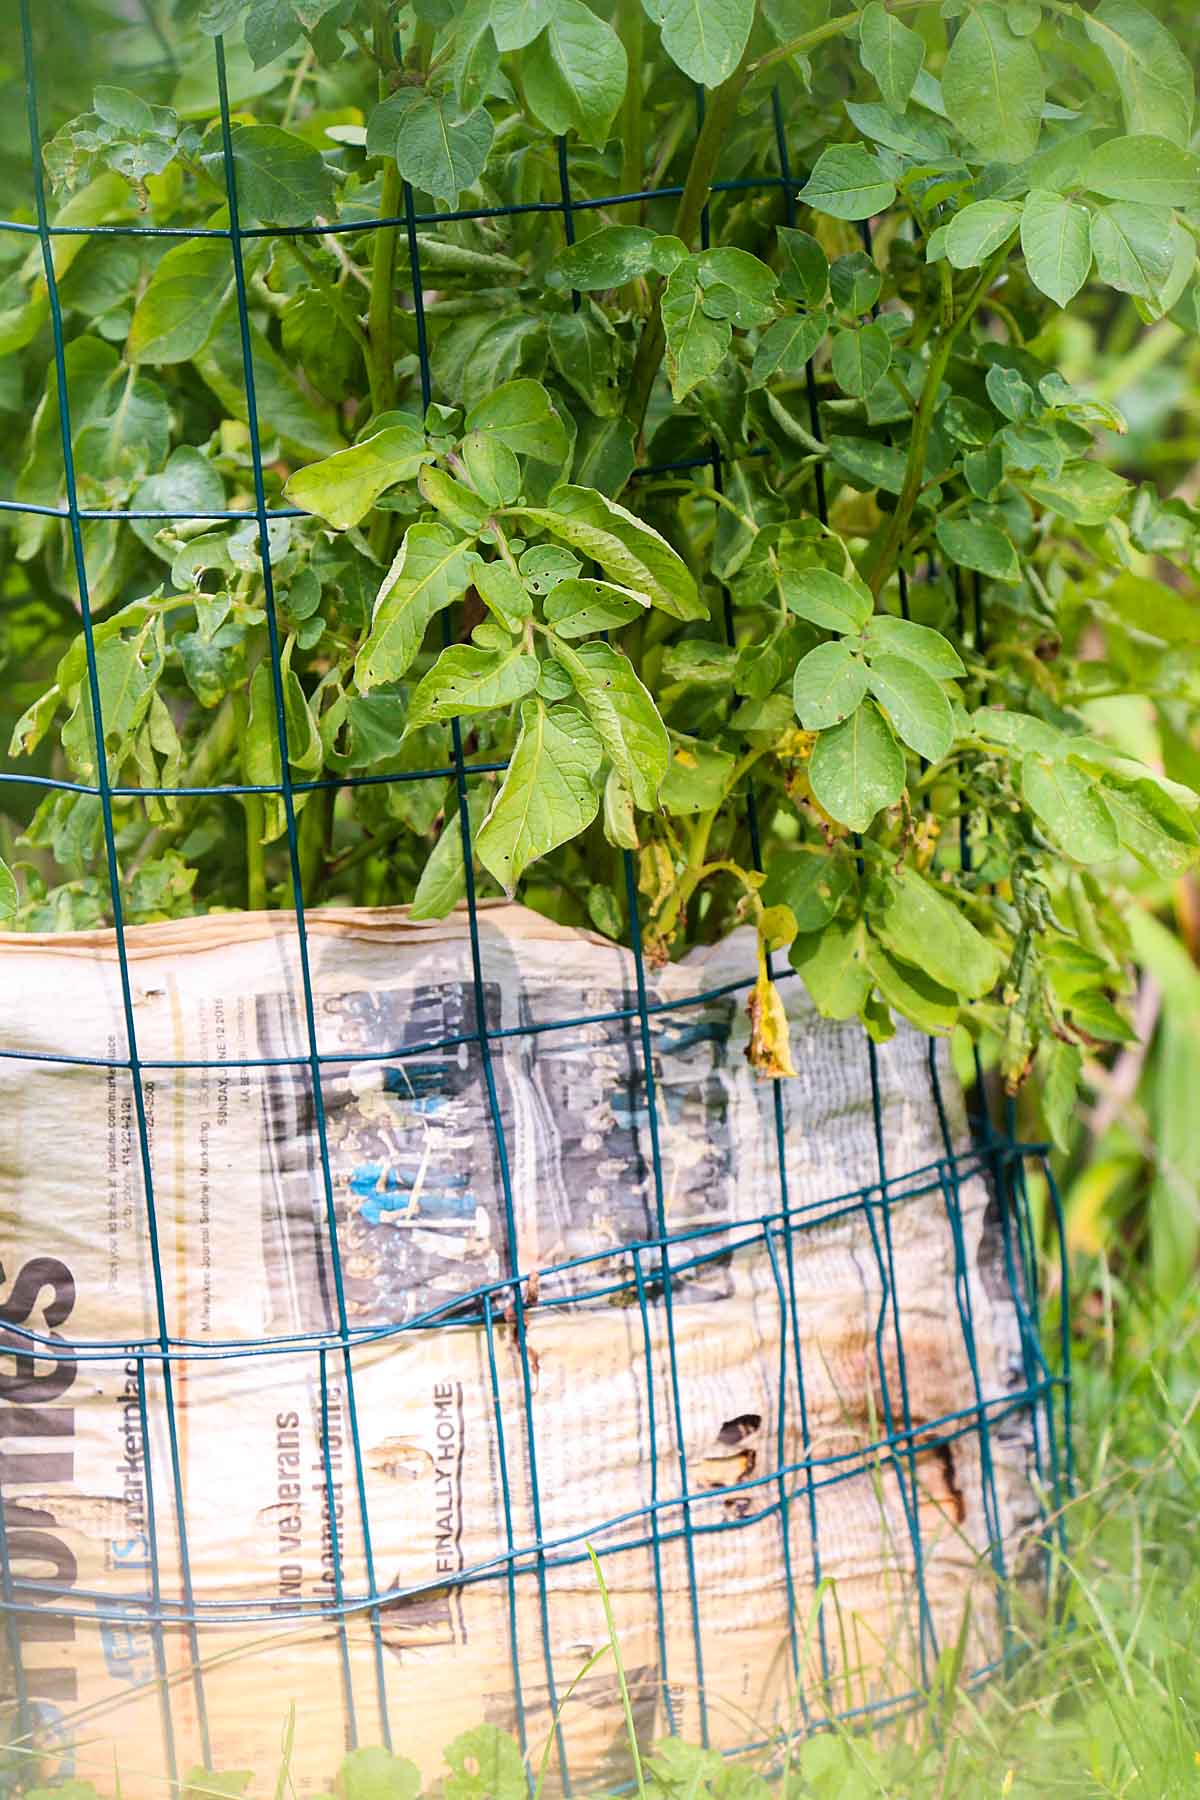
1. Remove the sod (this is optional but makes for better anchoring of the cage) and set the cage about 2 inches into the soil. Line the cage sides with newspaper to keep the soil inside (some people use straw, but then I’d need to go out and buy some—remember this is easy).

Basic Potato Cage
2. Fill in a layer of compost or garden soil, then add sprouting potatoes. If you are short on potatoes, you can cut them in pieces, leaving a couple eyes on each, but then you risk problems with rot. If you decide to do this, let the cuts dry for a day before planting to reduce the risk. (I always have plenty of sprouted potatoes or friends with same).

Cage with Potatoes
3. Add another layer of compost and more potatoes, then top off.

Compost Bin
4. As the potatoes sprout, continue layering with more dirt for about a month as the plants get taller. Then neglect them for awhile.
How and When to Harvest
The potatoes are ready to harvest when the plants begin to die back. If some are dying off too slowly (a risk from planning miscellaneous varieties with different maturity times) and your patience is failing, you can snap off the late stems and the potatoes will begin to “ripen” underground.
Some experts recommend letting the potatoes rest in the soil for 2-3 weeks before harvesting, to let the skins toughen. If you are trying to keep your potatoes over the winter this is probably a good idea. If you plan to eat them quickly (and save your CSA potatoes for winter), the waiting time can be shortened.
When you are ready, you can pull off the wire cage, loosen up the soil and go on a treasure hunt!
Beginning to die back
Tips and FAQs
Are potato cages the most productive way to do a potato garden? Well there are two ways to look at this. There probably are ways to get more potatoes, but they’re going to be harder . If you’re like me, too hard means you’re going to skip it and put something on the grill instead. If you don’t do it, you won’t get any potatoes. And that makes this more productive!
How often do I need to water the potatoes? This will depend on the heat and rainfall in your area. In Wisconsin, I don’t generally water them. The cages are big enough and retain enough water to last between showers. In drier areas, it will likely be a different story.
When I need to water my garden, I like use a sprinkler on a timer (they usually have overrides that you can use as needed) for the easiest and most foolproof method. Not that I’d ever forget (ahem).
Why don’t you line with plastic? Sometimes plastic is a necessary evil, but not in this case! Newspaper (or straw) is convenient and even breaks down to feed the soil.
More Gardening DIY
- An Inexpensive DIY Pear Picker
- Garden Vinegar: When Mulch Fails
- Rhubarb Growing Tips
- How to Grow a Winter Bulb Garden in Minutes!
- From Sunset, More Lazy Gardening Tips

You can grow different varieties in your potato garden!
Updated from a 5/2011 post.
I’m going to try planting potatoes for the first time. Can you tell me how to harvest them? Do you dig them all up at the same time? Thank you for the very helpful post!
I harvest them all at the same time–though sometimes I’ll dig my hand down through the dirt for a couple early potatoes :). But part of the fun of this is you can just pull off the cage and scoop up potatoes so the harvest is really easy too! Have fun!
Thanks Inger, for this super well explained WITH PHOTOS guide to EASY growing potatoes.
Cannot find purple potatoes locally ( Fort Lauderdale)so have ordered some seed potatoes ( EXPENSIVE -with shipping =$1 per potato!!) for health benefits as recently read in new book by Dr William LI, ” EAT to BEAT Disease”.
Hubby and I are late 70’s early 80’s and beginning to Get Old”. ( Better than NOT getting any older!!) Will try to have my wire cages and good dirt ready for the delivery of the Potatoes in just few days – USA shipper!
Really very happy to see your fantastic guide to doing this. I do like EASY!! and think any time of year in South Florida is s good as another for planting anything.
We have iguanas of all sizes which are plant eaters, but I think maybe a top of wire fencing will keep them out of my potato patch!! Don’t want them around at all, but don’t want to hurt them either. My min-chihuahuas ‘guard’ the yard by watching out window much of the time and alert me when they spot an “Iggy” in the yard. I release the two 6-pounder sisters and they delight is chasing the “Iggy’s” out of the yard!!
Thanks for writing Jane. I had the same problem but with purple SWEET potatoes–so expensive in fact that I gave up. Although once you have them you can save some for future years. It seems funny to think of planting potatoes now, but well southern Florida vs Wisconsin! I didn’t realize iguanas went after gardens–we just have the deer and rabbits! Enjoy your potato garden!
Should I water once after planting?
If the compost/soil you use is moist, watering right away probably isn’t critical. I am really pretty hands off with this. But if it’s dry-ish or if you’re in a drier area or hit a dry spell, I’d give it a little help. Have fun!
Hello can I grow potatoes in laundry basket and use the newspaper lairing with soil it will be successful or not pls ans I m a new gardener and I m doing it on the tarrece bcoz I have no garden space..
Yes, I think that should work–just get one as deep as possible. Make sure to put a thicker layer of dirt on the bottom so the potatoes can sent some roots downward. You’ll get a smaller harvest, but it should still be fun! And the plants are pretty enough for the patio! Let me know how it goes if you get a chance.
Hi Inger, What a great idea! I have a few questions that I hope you can answer for me. Did you ever fertilizer your potatoes in the cages? What varieties of potatoes did you have the most success with? Also can you tell me how many pounds of potatoes did you harvest from your planting in one cage? I am wondering if I can use straw instead of soil/compost to keep on covering the green tips once they start peeking through the top layer of soil in the cage. Thank you! (Lots of questions but hope it is okay!)
I don’t think this is necessarily the highest yield way of producing potatoes Evangeline–but it’s so easy that I don’t care! I don’t fertilize but do add compost every year. We save the old soil for the next year but there always seems to be less, so we mix in a fair amount of new compost every year. I have never tried straw but this article http://www.agardenforthehouse.com/2013/10/my-potatoes-in-straw-growing-experiment/ mentions success–though says it produced smaller potatoes. This would make sense to me because potatoes in straw wouldn’t get the level of nutrition they do out of soil
I have planted red potatoes, yukon gold and purple potatoes. Never tried russets since we tend to use less of those. I always try to save some purple potatoes to plant because those are so much more expensive to buy.
Hope this helps. If you try the straw and get a chance I’d love to hear how it works.
Hi Inger! Thanks so much! My neighbor made 3 cages for me so I am getting ready to plant them today! I am excited! I will let you know how it goes!
Have fun and good luck!
Hello! I’m super interested in trying this this year! I do have a couple of questions, though. First, how many potatoes (or eyes) should I plant per layer? Next, about how much dirt should I place in each layer and how much dirt should I add over the course of the month? Second, what is the best time to start potatoes? Sorry, it’s a lot of questions, I know! 🙂
I am thinking I probably do about 5 potatoes per layer, with perhaps 8 inches between them. Between layers I try to make sure all the potatoes are completely covered and then add a bit of extra (couple inches?) for good measure. As you add more dirt (both in your first planting and later) it will compact a lot more than you expect so err on the side of more dirt. I am really very casual about it so don’t worry that you are doing it wrong! In Wisconsin I have started as early as the beginning of May in a really warm spring, but usually I do it around the end of May. Interestingly the early planting didn’t result in an earlier crop so I don’t know if that was just the variety of potato or if it doesn’t help that much. Good luck Renae. If you give this a try I’d love to hear how it goes.
Pingback: Fingerling Potatoes with Parsley Butter or Oil | Art of Natural Living
You mentioned you put one row of potatoes on the bottom, then cover them and add another layer of potatoes on top of the bottom potatoes. Does this cause the potatoes to be small since there are a lot in a small space? I’m planting today and was curious. Thanks
Wow I wish we were warm enough to start this here! I get a whole variety of sizes but since it’s the only way I’ve ever grown potatoes, I am not sure how the growing style impacts size. I get some that are tiny (which my kids fight over as bite-sized potatoes), some that are the same size as the “parents” (and I assume the CSAs filter out the smaller potatoes they grow) and some in between. I do put a good bit of dirt in between layers–this goes through a lot of compost. Good luck trying this and if you get a chance let me know how it goes this fall.
This article is so helpful. I am wondering what you would recommend if there was no ‘safe’ soil to place the cage on top of. We have just moved to a very old historic home. I know that it is very possible that there is lead in the soil and as the lot is very small, its not an option to move far from the dwelling. What would you propose to use as a “bottom” for the cages if digging into the dirt is not an option? We are actually going to have a small container garden on a cement patio. Thank you!
You are wise to be concerned with this, since my understanding is that potatoes can pick up quite a bit of lead–have you had the soil tested so you know how bad it might be? That can influence your approach to gardening.
In the potato cages, the potatoes don’t actually grow down much into the base soil, but you would still need a good barrier if you plant over contaminated soil. This article http://cwmi.css.cornell.edu/Soil_Contaminants.pdf from Cornell recommends raised beds with landscape fabric as a barrier as does the National Gardening Association (http://www.garden.org/urbangardening/?page=sept-lead ). If you try this, you would place the potatoes higher in the cage with extra (clean) soil below. Or if you could find a big shallow pot (it wouldn’t need to be as wide as my cages) and can adequately anchor the cage, you might even try it on the patio. I think they are reasonably nice looking when they are big. If you try something, I’d love to hear how it goes. Have fun with you container garden.
You could always get large flower pots and either plant them in the flower pots or put the cage/fencing on top and prepare it as per the directions in the article.
Thanks Maxine. I suppose there must be big pots out there–people plant trees after all, don’t they!
Good idea. I have a surplus of cardboard which I dump. Am going to try stealing the top and bottom flaps to the side of the boxes and use them to grow the potatoes in. Stephen in Queensland Australia
I am just ready to harvest this year’s potatoes. Good luck!
I cannot wait to try this. I thought I would need to build a wood bin but your method looks so very much easier, thank you!
We love doing this Angela. Many people like the fact that it saves space, but even with a good sized yard, I like the ease of planting and harvest. Your kids might have fun going on a potato hunt at the end of the season too! Hope you get a chance to try it.
Great idea…I always wanted to plant potatoes, but thought I didn’t have enough room in my garden! Can’t wait to give this a try!
You should try it–it is so easy!
Being a lazy gardener, I am going to remember this, Inger. Thank you! P.S. We have some blue (purple?) potatoes in the basement gifted by a fellow gardener. Trying to decide what to do with them…
I have fried up purple potatoes with scrambled eggs and turned the eggs green (see: https://artofnaturalliving.com/2010/11/16/green-eggs-and-purple-potatoes/ ). But if they end up sprouting, pop them into your potato garden in the spring!
Thank you, Inger. I just mentioned your Oscar blog post in my blog tonight. Hope you get at least a few visitors!
I have two young daughters and they LOVE purple potato “French fries” (which are actually baked in the oven). Super easy. Wash and cut potatoes into French fry shaped lengths (you can peel them or leave the skin on as you prefer). Place them in a 1 gallon zip type bag and add about 1 tbsp olive oil per pound of potatoes, then add (also per pound of potatoes) 1 tbs bread crumbs, 1/2 tsp salt, and 1/8 tsp of whatever herbs or spices you like (we do black pepper, oregano, thyme, and basil). You can also add a little grated parmesan cheese. Zip the bag shut and shake it around (or let your kids do that) until well coated. Pre heat the oven to 425 and line a sheet pan or baking pan with foil and give it a generous spray with cooking oil or butter. When the oven is ready, dump the fries out of the bag into a single layer on the pan and put them in the oven (put them in the center/middle of the oven). Let em bake about 15 minutes, then flip them around with a spatula a bit to get them to cook on all sides. Put them back in for about 10 more minutes, then done! If you want to make steak fries instead of regular sized, you may have to add another flip and 10 more minutes of cook time. This works great with purple potatoes and best with russets. I find yukon gold to be not so great. If you like sweet potato fries, blanch the fries for about a minute then cool in an ice bath and blot dry with paper towels before putting them in the zip bag. Oil and salt are the same but try using nutmeg and cinnamon as spices instead.
I’m pretty sure purple fries would be popular in my house too! Thanks for the tips Hannah!
This is me allll over it! I can’t wait to try this when I get a house =)
And the option is good for large or small yards…
Pingback: Homemade Tomato Cages « Art of Natural Living
Pingback: A Natural Gardening Bodycare Giveaway « Art of Natural Living
Thanks for the information.I will give this a shot in dry ol’ Utah.
How do you water potatoes that are grown in this manner?
The rain takes care of most of the watering, though if we hit a particularly bad dry spell, we use a hose or sprinkler like for a regular garden. This year as warm as it has been, I started them before the outside water is even on and we’ve watered once or twice with a big bucket!
I’ve just come across this post of yours, and totaly believe in a bit of laziness every now and then in the garden. I’ve always meant to try a cage for growing them, but as with many things never got round to it! Mind you I’ve cut back on the volume of spuds to grow this year, we just don’t eat that many, but the cage would certainly help solve competing space probelms
No space problems for me–just the laziness! If you are ever at a loss on what to do with extra potatoes, you should take a look at: https://artofnaturalliving.com/2011/03/20/amazing-potatoes-au-gratin%E2%80%94no-cheese/ We started to eat a lot more after I tried that!
Lol, I don’t think there is a National Bulb Month, yet…
WHAT A GREAT Idea, Inger!!! I wasn’t thinking about growing any vegetables this year, although, the compost is “mighty ripe.” However, if I were, I would definitely try your way. I think I’ll pass this link to my daughter. She is doing a vegetable garden this year and she’s been so worried about losing her crops to the dogs. Square foot gardening is on her agenda but, she lives in Idaho and I bet she would love to pass this technique on to her friends.
Thanks for sharing…
P.S. Have you ever heard about growing bulbs in straw bales???
Do pass this to your daughter–I always like to make someone’s life easier! And I’ve never heard of growing bulbs in straw bales. Do you do this?
I passed it on to my daughter Inger. And no, I haven’t tried the bulb trick yet but I’m thinking about it. Need to find out more info online. It sounds intriguing though…
Well trying the bulbs might have blog potentail–let’s see, is there something like National Bulb Month?
What a great idea! I’m curious to try growing my own potatoes sometime, but I doubt it will work in a window box. 🙂
Yes–I think you’d even have trouble with fingerling potatoes in a windowbox! Perhaps there will be a terrace in your future (though I might grow something tasty and ornamental then!)