
Poppyseed Ham and Cheese Sliders (& a Secret)
Filled with tender ham, creamy cheese and flavorful sauce, Poppyseed Ham and Cheese Sliders are easy, tasty and practical—especially with my secret.
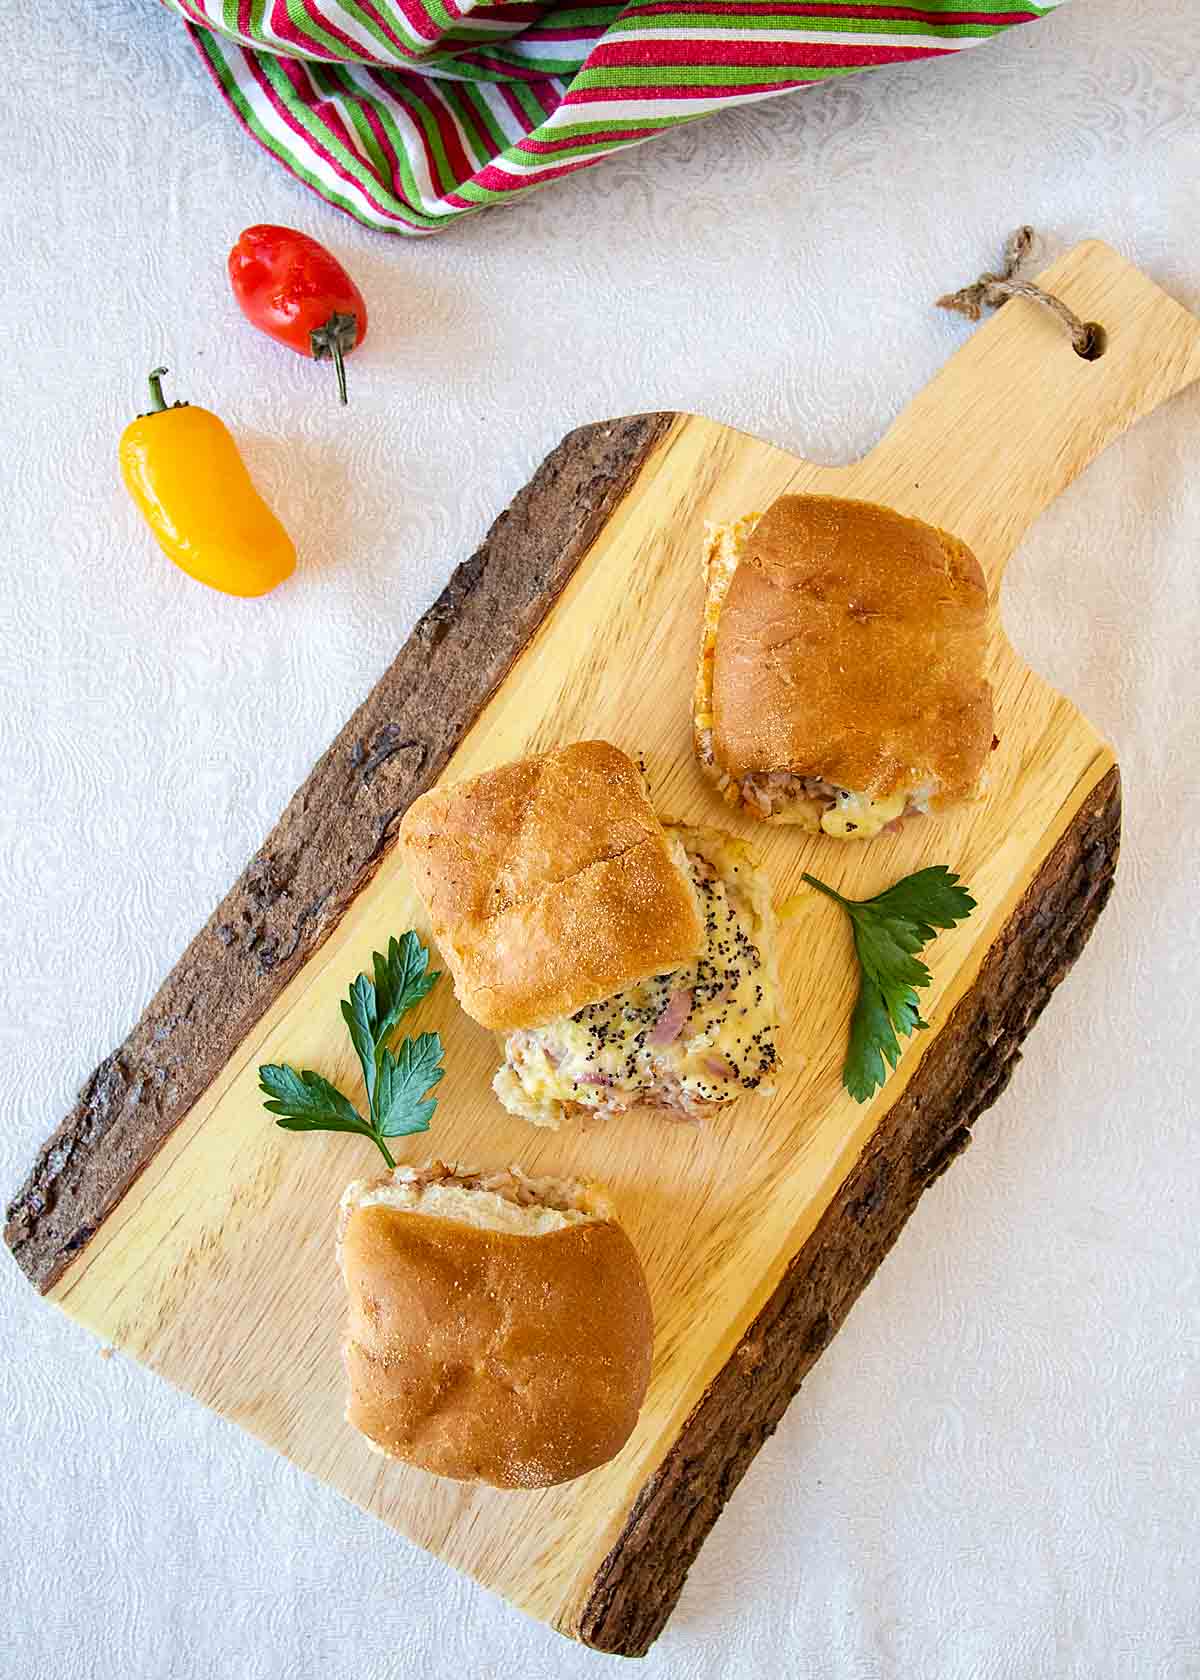
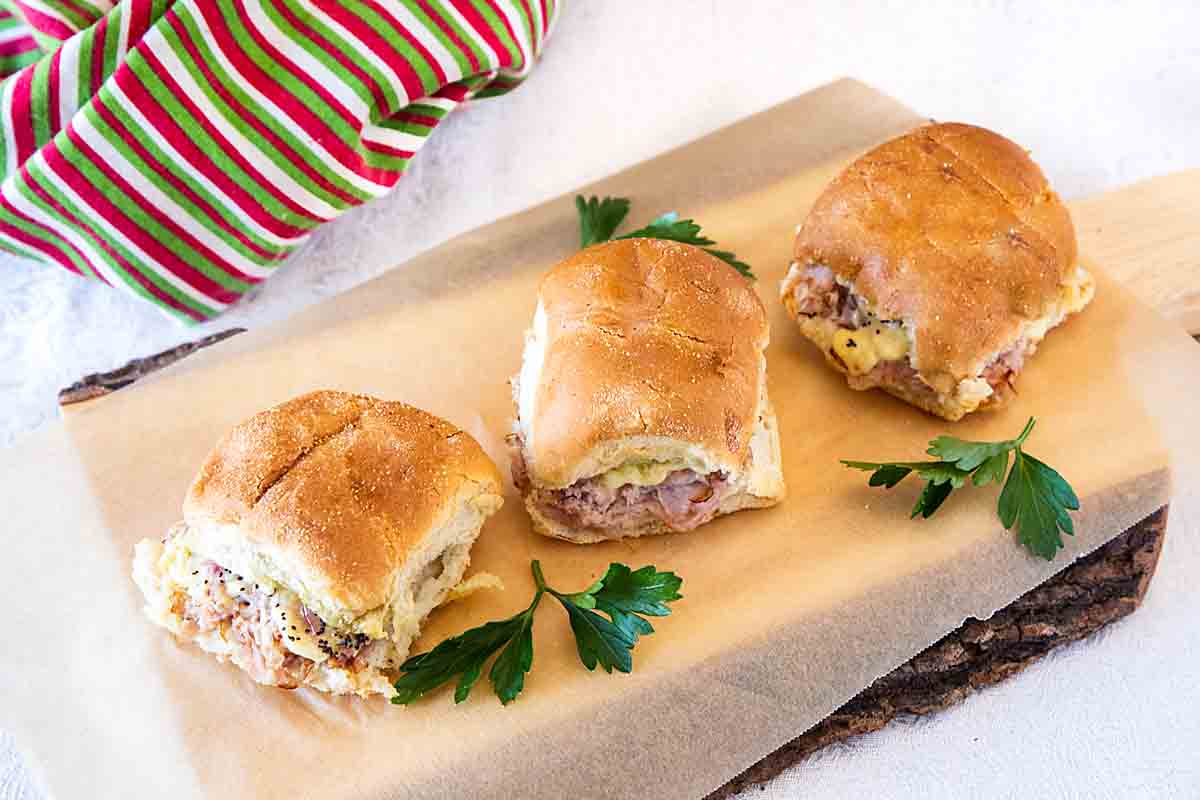
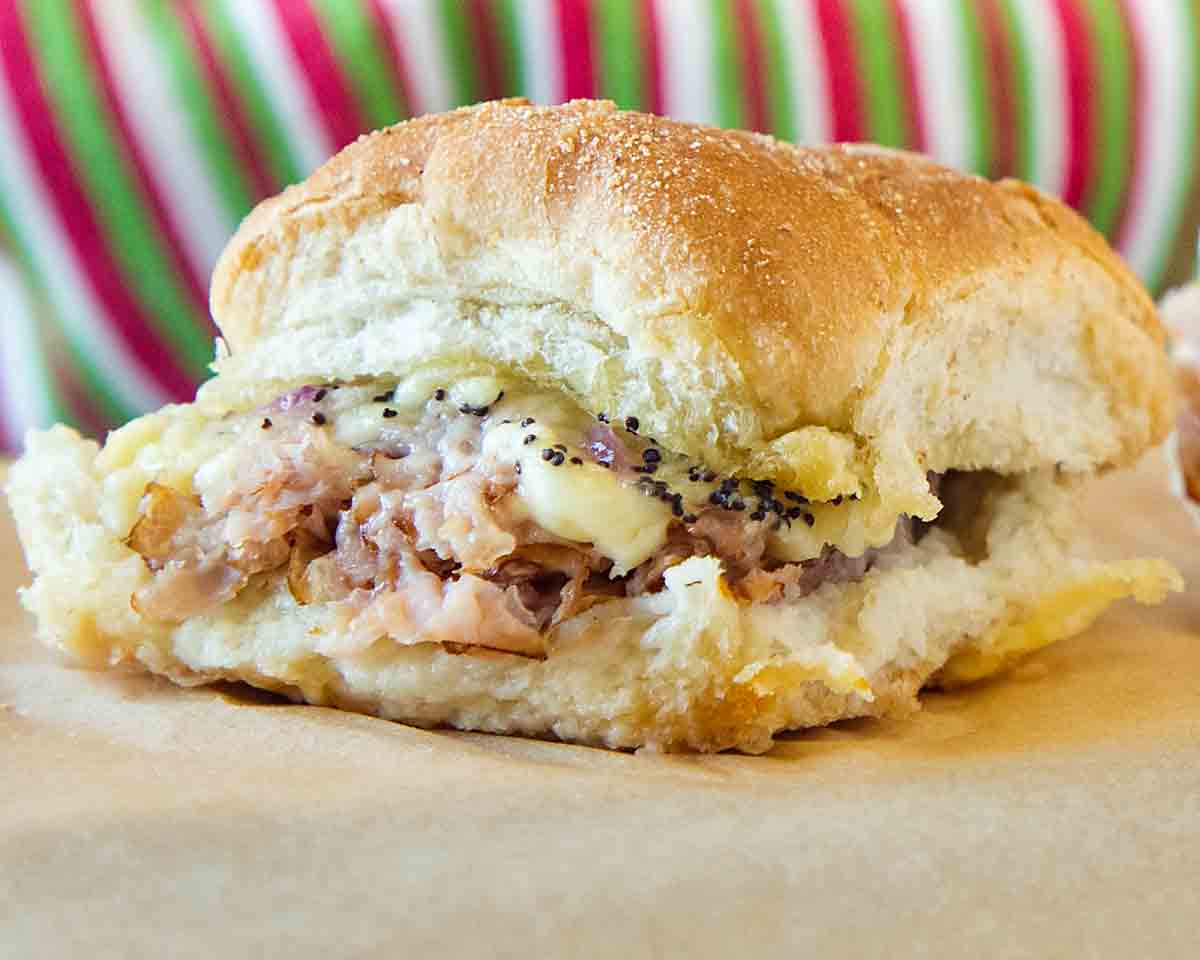
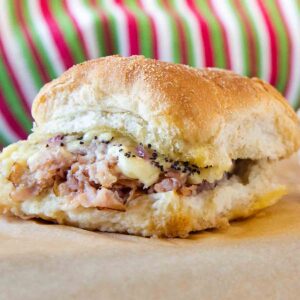
They’re all the rage! And who could argue with a sandwich that’s easy to make in large quantities. And tastes… amazing! Crunchy on the outside and creamy on the inside, it’s probably as close to comfort food as a sandwich gets!
Poppyseed Ham and Cheese Sliders, most typically made with Hawaiian Rolls, are perfect for a party or larger gathering. You just make them up as a big slab of sandwiches!
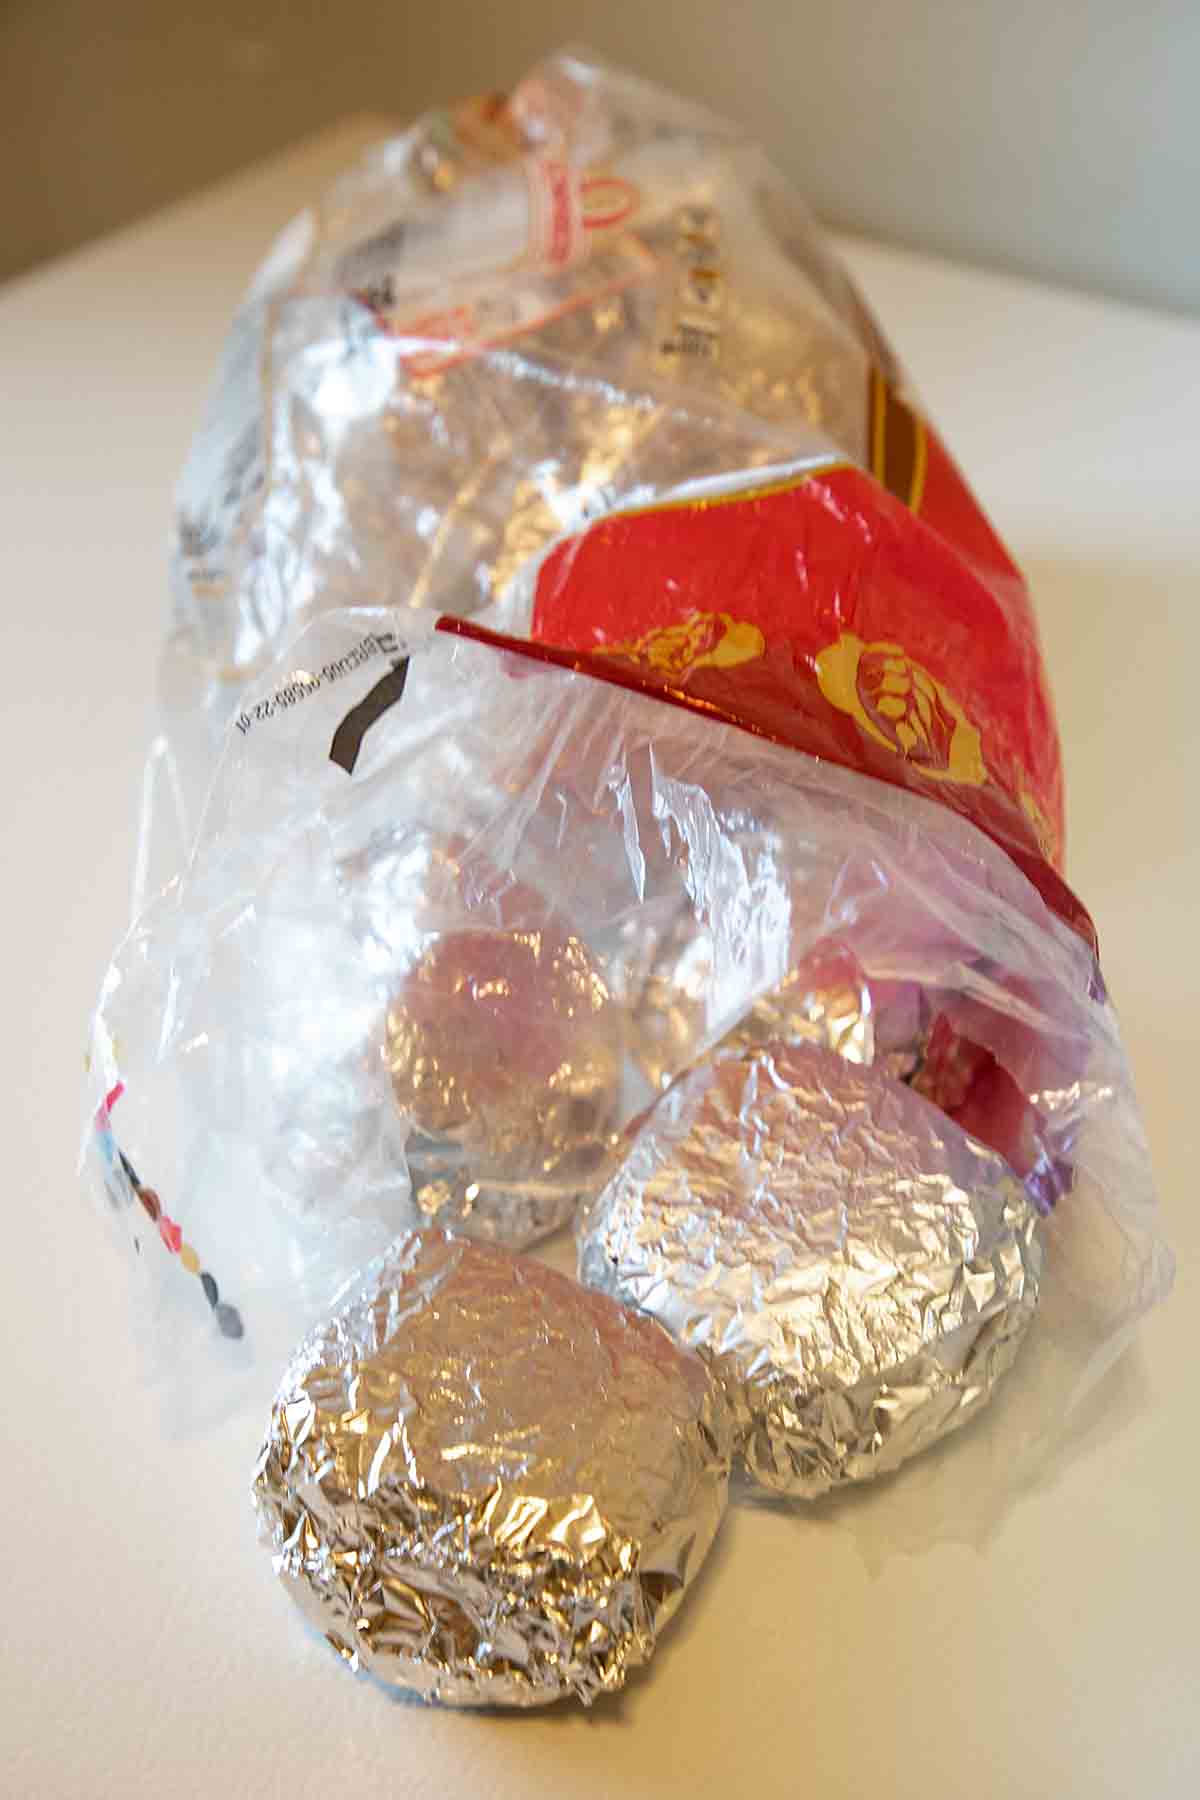
But I have a secret for you. They’re just as amazing frozen individually and cooked up as needed in smaller quantities. My family’s been doing it for over a half century, err, years!
And don’t forget that football season’s coming. Make life easy and have a stash of these in the freezer. Then just pop them in the oven and enjoy the game instead of cooking.
Life is good!

Where did these sandwiches originate?
I searched all over the internet for the origin of these sandwiches and all I came back with was “ham and cheese sandwiches started in 1961” Well, sorry guys, Croque Monsieur dates back at least to 1910!
When it came to Poppyseed Ham and Cheese Sliders, I came up completely empty. I do know that my aunt was making a hamburger-sized freezer version no later than the early 1970s. Yes, I remember my family making a surprise visit, where she effortlessly moved a handful from freezer to oven, then continued socializing. Genius!
Given the convenience they offer, the recipe spread like wildfire through the family.
Why You’ll Love This!
Tasty. Ham and cheese is a classic combo and the addition of the buttery, oniony topping makes this even better!
Fun. I wish I had a stretchy cheese pull photo for you, but let me tell you, these are a crowd pleaser!
Efficient. Whether you make them as a big party tray, or as individual sandwiches, this is a meal that will work even when life is busy!
What You’ll Need
Ingredients:
- Butter. This is the base of the sauce.
- Poppy seeds. This adds flavor to the sauce.
- Mustard. This adds flavor to the sauce.
- Worcestershire sauce. This also adds flavor to the sauce.
- Onion. Yup, lots of flavor in this sauce!
- Ham. This is the main filling of the sandwich. I recommend shaved deli ham.
- Swiss cheese. This adds creaminess to the filling.
- Slider sized rolls. You can use Hawaiian rolls or other slider rolls.
Special Tools:
- A long knife and aluminum foil.
Step by Step Directions
Prepare sauce. Soften butter, then mix with remaining sauce ingredients.

Slice through buns horizontally to create a top layer and bottom layer, but don’t separate the tops or bottoms from the adjacent buns.
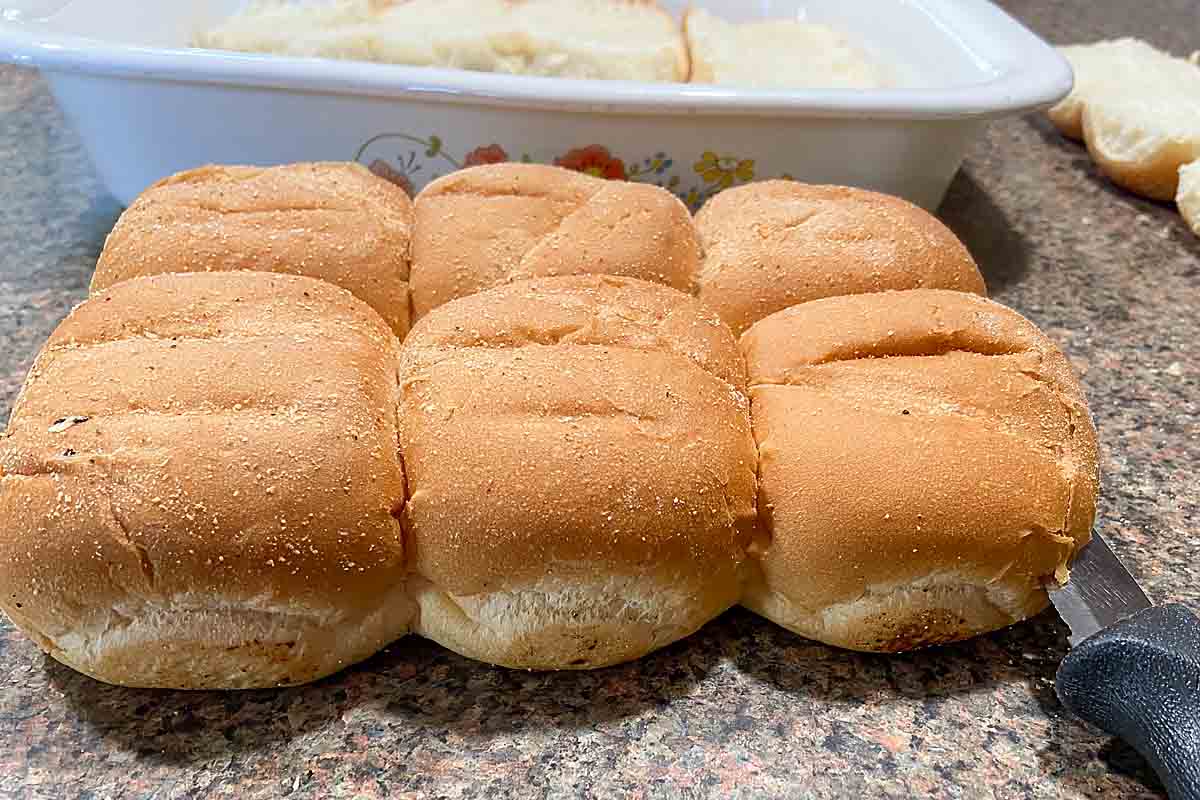
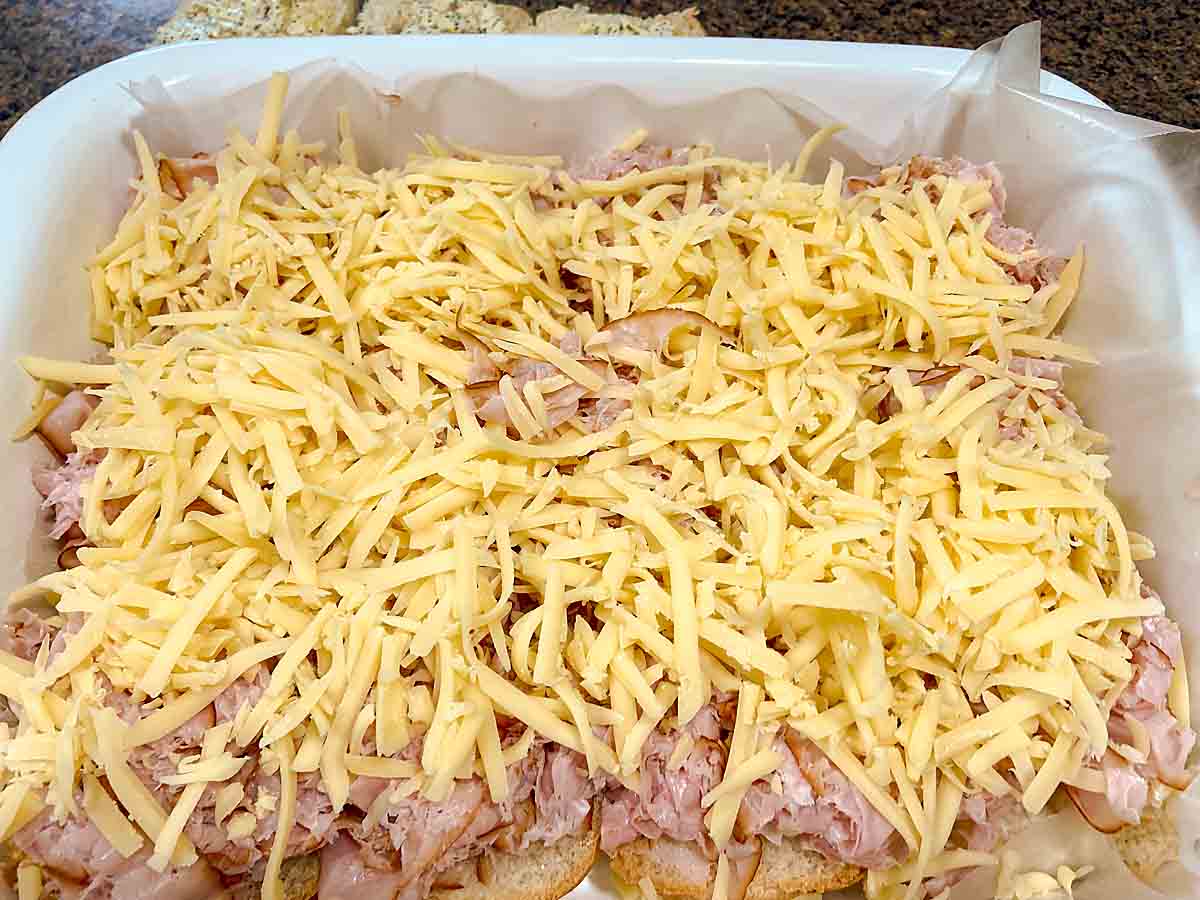
Set the bottom half of 12 buns into a 9 x 13 pan (12 will fit in one pan, so you’ll need two for 24) and layer with ham, then grated cheese.
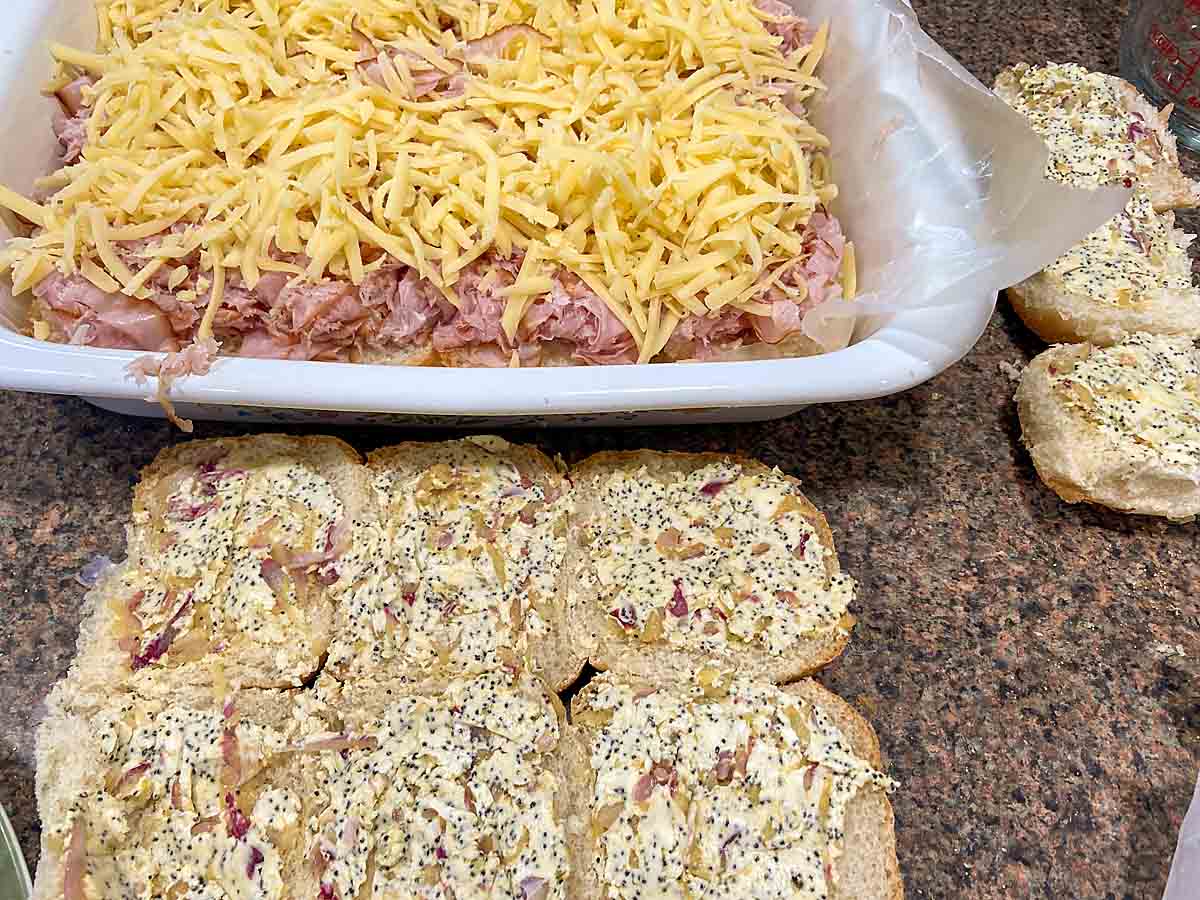
Spread the sauce on the underside of the top layer then set that on top.
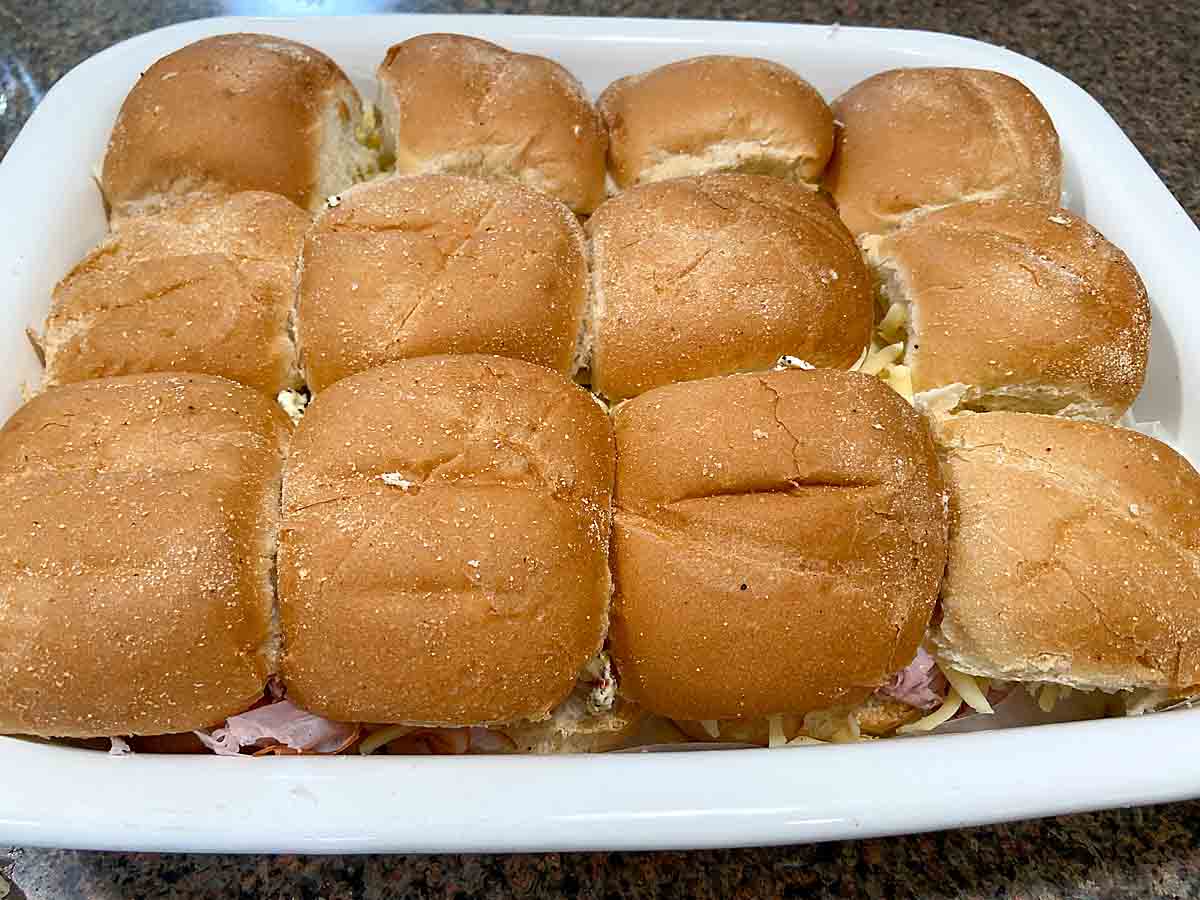
If you are making them now, cover with foil and bake for about 20 minutes until cheese is melted and buns are crunchy. Remove foil at the end if needed to crisp. If freezing for future use, separate into individual slider sandwiches and wrap each in foil. To bake from frozen, do not thaw or unwrap.

How to Serve
When I am serving a casual sandwich like this, I love accompanying it with a casual salad. Some favorites include coleslaw, Broccoli Waldorf Salad, Thai Carrot Salad, and Carrot Raisin Salad. Raw vegetables with dip is another nutritious option and there’s always the classic chips and a pickle.
They are also delicious with a cup of soup!
Like Slow Cooker BBQ Pulled Turkey, these are an especially good sandwich any time you want to be focused on the meal/event like a Game Day!

Variations
My freezer version and the “popular’ version differ in two main ways. Most importantly, the freezer version is broken apart, wrapped individually in foil, then frozen, while the “popular” version is baked all together in a covered pan.
Second, for the freezer version, the poppy seed topping is spread inside the rolls, like you’d spread ketchup or mayonnaise. The “popular” version typically melts the sauce and pours it on the outside top of the buns. Because putting the sauce inside creates such creamy goodness (and the buns still get crisp), I recommend doing it that way for both versions.
Of course, If you’re simply looking for and easy and tasty ham and cheese sandwich, don’t forget the simple, but classic Grilled Ham and Cheese!
And to extend the concept, how about these Bacon Cheeseburger Sliders, Pizza Sliders, Hawaiian Roll Breakfast Sliders or Roast Beef Sliders!
Before and After
Save leftover baked sandwiches covered in the refrigerator and reheat within a few days! Unbaked sandwiches will last in the freezer at least 3 months if well wrapped.
Tips & FAQs
Do I need to use Hawaiian rolls? Of course not. We ate these for years on hamburger buns. But the sweetness of these rolls is a good complement to the ham, so you might want to give it a try.
What is the best type of cheese? My first choice is Swiss, as the classic partner to ham. Gruyere, a cousin to Swiss, is also popular, but in my mind is too expensive and probably wasted on this. Besides these, I have seen Havarti, Cheddar and cheeses I’ve never even heard of. While I like the classic taste of Swiss with ham, you do you.
What is the right type of ham? I usually serve organic ham in our household, but deli ham that is shaved very thin makes these meltingly tender. So that’s my preference and I even have them cut it especially thin! I figure that the reduction in stress from having these around might just offset some of the processed food health risks.
Some people swear by specific hams, e.g. Black Forest Ham, but since I make this in bulk, I usually buy what’s on sale.
Poppyseed Ham and Cheese Sliders

Ingredients
Sauce
- 3/4 cup butter
- 1 1/2 Tablespoons poppy seeds
- 1 Tablespoon mustard
- 1 teaspoon Worcestershire sauce
- 1 medium onion grated
Sandwich
- 2 pounds thinly shaved ham.
- 1 pound Swiss cheese grated
- 24 dinner roll sized buns or Hawaiian rolls
Instructions
- Prepare sauce. Soften butter, then mix with remaining sauce ingredients.
- Slice through buns horizontally to create a top layer and bottom layer, but don’t separate the tops or bottoms from the adjacent buns.
- Set the bottom half of 12 buns into a 9 x 13 pan (12 will fit in one pan, so you'll need two for 24) and layer with ham, then grated cheese.
- Spread the sauce on the underside of the top layer then set that on top.
- If making immediately cover with foil and bake at 350 F for about 20 minutes until cheese is melted and buns are crunchy. Remove foil at end if needed to crisp.
- If freezing for future use, separate into individual slider sandwiches and wrap each in foil. To bake from frozen, do not thaw or unwrap. Bake until cheese is melted and buns are crunchy, about 30 minutes. Remove or loosen foil at end if needed to crisp.
Originally published March 2012.
If I were freezing, say, half the recipe, and intended to heat all of it at a future date, would it be okay to wrap it as one block rather than individually? You’ve done a great job on this blog. I found you when looking for a sponge candy recipe, and yours (plus your technique notes — saved me from reinventing the wheel) is fabulous.
Thank you so much Elizabeth! And to answer your question, my concern would be if you put a big frozen block in the oven, the outside sandwiches might be overly crunchy before the inside ones were done. If you froze a block no more than two sandwiches wide, I think you’d have a good chance right from frozen, though I haven’t tried it. I did some quick browsing and found someone who said they freeze the whole batch but they thaw it first in the refrigerator, then bake when thawed, so that is another option to try.
Pingback: Light and Healthy, White Wheat Slider Rolls « Art of Natural Living
These look really tasty and perfect for on-the-go!
Yes, they are great for taking with. They’ve been consumed in the car this week already!
i’m certainly rarely desperately busy, but there are ALWAYS times when i appreciate a quick and easy meal. this is a great idea!
Lucky you on the busy! But I agree that these are likely to get eaten again, busy or not!